How to Use Watering Globes for Plants: Easy Tips for Thriving Greens
Are you tired of constantly worrying about whether your plants are getting enough water? Watering globes might just be the simple solution you’ve been looking for.
These clever little devices deliver water slowly and steadily, keeping your plants happy and healthy—even when you’re busy or away from home. But how do you use watering globes correctly to make sure your plants thrive? In this guide, you’ll discover easy, step-by-step instructions that anyone can follow.
By the end, you’ll feel confident setting up your watering globes and giving your plants the care they deserve without the hassle. Keep reading to unlock the secret to effortless plant watering!

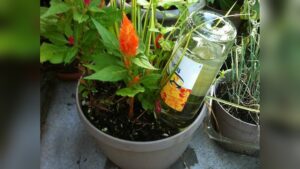
Credit: lexihome.com
Choosing Watering Globes
Choosing the right watering globe ensures your plants get the best care. Various types and sizes suit different plants and pots. Material quality affects how long your globe lasts. This section covers key points for selecting the perfect watering globe.
Types And Sizes
Watering globes come in many shapes and sizes. Small globes fit well in pots for herbs or succulents. Larger globes hold more water for bigger plants or outdoor use. Choose a size based on how much water your plant needs. The shape also matters; some have narrow stems for tight soil, while others have wide openings for easier refills.
Materials And Durability
Most watering globes are made from glass or plastic. Glass looks nice and is eco-friendly but can break easily. Plastic globes are lightweight and less fragile but may wear out faster. Choose a globe made from thick, sturdy material for long-lasting use. Check for UV resistance if you keep plants outdoors to avoid sun damage. Durable globes save money and protect your plants better over time.
Preparing Your Plant
Preparing your plant before using a watering globe is important. It helps the globe work properly and keeps your plant healthy. Start by checking the soil moisture. Then, make a hole for the globe. These steps make watering simple and effective.
Checking Soil Moisture
Touch the soil with your finger to check moisture. If it feels dry, water the plant first. Wet soil stops air bubbles in the globe. This lets water flow smoothly to the roots. Avoid placing the globe in dry soil. It can block water from coming out.
Making A Hole For The Globe
Use your finger or a small tool to dig a hole. Make the hole near the plant’s base, close to the roots. The hole should be just wide enough for the globe’s stem. Insert the stem gently to avoid damaging roots. This hole helps the globe stay steady in the soil. It also allows water to flow directly to the roots.
Filling The Globe
Filling the watering globe correctly ensures your plant receives steady moisture. Start with clean water to avoid harming the roots. Using the right water and additives helps keep plants healthy and thriving.
Using Clean Water
Always use fresh, clean water to fill the globe. Tap water is usually fine unless very hard or treated with chemicals. Avoid water that has been standing for days, as bacteria may grow.
Use a funnel to pour water easily into the globe’s narrow neck. Fill it almost to the top, leaving a little air space. This helps water flow smoothly into the soil.
Adding Liquid Fertilizer
You can add liquid fertilizer to the water for extra plant nutrition. Use a diluted solution to avoid burning the roots. A weak fertilizer mix provides steady feeding over time.
Mix the fertilizer thoroughly with the water before filling the globe. This ensures even distribution of nutrients. Avoid over-fertilizing, as it can harm your plant.

Credit: www.youtube.com
Inserting The Globe
Inserting the watering globe properly ensures your plants receive steady hydration. Start by preparing the soil and the globe. This step helps water flow evenly and prevents air bubbles. Follow simple actions to place the globe securely and keep your plants healthy.
Covering The Opening
Fill the globe with clean water. Use a funnel to avoid spills. Place your finger firmly over the opening. This stops water from leaking out too soon. Quickly turn the globe upside down. Keep your finger on the opening until the globe is in the soil.
Securing The Stem In Soil
Make a small hole near the plant’s roots. Use your finger or a tool to dig gently. Insert the globe’s stem slowly into the hole. Push it deep enough to stand firmly. The soil should hold the globe steady. The water will drip out slowly to feed your plant.
Maintaining Water Levels
Maintaining the right water level in your watering globe is key for healthy plants. The globe slowly releases water as the soil dries. Keeping track of how much water is left helps avoid overwatering or drying out.
Regular checks help you see how fast your plant uses water. This way, you can adjust refills to match your plant’s needs. Proper water level maintenance supports steady growth and keeps your plants happy.
Monitoring Water Usage
Look at the globe often to check water levels. The glass shows how much water remains inside. If the water level drops quickly, your plant needs more water or has high demand.
Watch your plant’s soil too. If it feels dry, the globe might be empty. Track water use over days to learn your plant’s pattern. This helps you plan when to refill the globe.
Refilling The Globe
Remove the globe carefully from the soil. Avoid damaging the roots around it. Empty any leftover water before refilling to keep it fresh.
Fill the globe with clean water. Use a funnel to avoid spills. You may add liquid fertilizer if needed. Cover the opening with your finger and invert it into the soil.
Make a small hole near the plant’s roots before inserting. Press the stem gently into the soil. This ensures water flows smoothly to the roots. Repeat refills as needed based on your monitoring.
Troubleshooting Common Issues
Watering globes make plant care easier. Sometimes, issues like clogs or poor water flow occur. These problems stop your plants from getting enough water. Troubleshooting helps fix these issues fast. Keep your globes working well and your plants healthy.
Dealing With Clogs
Clogs block water from leaving the globe. Soil or dirt often causes this. Remove the globe and rinse the stem with warm water. Use a thin brush or pipe cleaner to clear inside the stem. Avoid using sharp objects that can damage the globe.
Keep the soil damp before inserting the globe. Dry soil can cause dirt to stick inside the stem. Clean globes regularly to prevent buildup. This keeps water flowing smoothly and plants hydrated.
Ensuring Proper Water Flow
Water must flow slowly and steadily for best results. Check the globe’s stem for cracks or damage. A broken stem can cause leaks or block water. Make a small hole in the soil before inserting the globe. This helps water release evenly.
Place the globe deep enough so the stem sits near the roots. Water flows better when the stem is fully in the soil. Refill the globe only after water has fully emptied. This prevents overwatering and root problems.
Tips For Best Results
Using watering globes helps keep plants hydrated over time. To get the best results, follow some simple tips. Proper use makes sure your plants get the right amount of water. Adjust your approach based on the type of plant and its needs.
These tips help avoid overwatering or underwatering. They also keep your watering globes working well for longer periods.
Watering Frequency
Check soil moisture often to decide when to refill the globe. Watering globes release water slowly as soil dries. Refill the globe before it empties completely. Plants in warmer rooms or direct sunlight may need more frequent refills. Cooler or shaded areas require less frequent watering. Observe your plant’s leaves for signs of thirst or overwatering. Adjust watering frequency based on these signs.
Using Globes For Different Plants
Different plants have different water needs. Succulents and cacti prefer less water, so use smaller globes or refill less often. Tropical plants like more moisture and benefit from larger globes. Use one globe per plant to avoid excess water. For group pots, place globes evenly to cover all roots. Some plants may not suit watering globes, especially those needing dry soil between watering. Know your plant’s water needs before using globes.

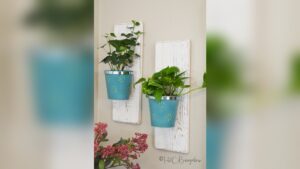
Credit: kyari.co
Frequently Asked Questions
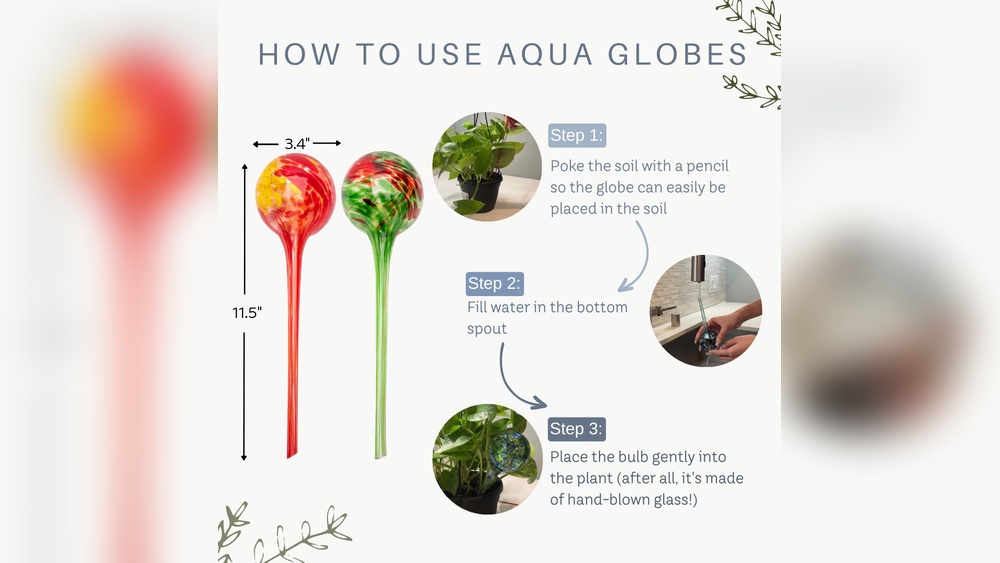
How To Properly Use Watering Globes?
Water soil thoroughly, then make a small hole near roots. Fill the globe with water, cover its opening, invert, and insert the stem into soil. Ensure a secure fit. Monitor water level and refill when empty. Clean the spout if clogged to maintain flow.
Can You Overwater With Watering Globes?
Yes, overwatering can occur if watering globes release too much water. Monitor soil moisture to avoid waterlogging.
Do Water Globes Really Work For Plants?
Water globes supply water slowly, helping plants stay hydrated between waterings. They work best with damp soil and proper placement. Regular refilling and monitoring prevent clogs and ensure consistent moisture. They are convenient but not a full replacement for regular care.
How Many Watering Globes Per Plant?
Use one watering globe per small to medium plant. Large plants may need two globes for even watering.
Conclusion
Watering globes help keep plants hydrated with less effort. Start with moist soil for best results. Insert the globe carefully near the roots. Water slowly seeps out as the soil dries. Check the globe often and refill when empty. This simple tool supports healthy plant growth.
Use watering globes to save time and water. Your plants will stay happy and healthy longer.