How to Make Self Watering Containers for Plants

Are you tired of constantly remembering to water your plants, only to sometimes forget or overdo it? What if your plants could take care of themselves, sipping just the right amount of water whenever they need it?
Making self-watering containers for your plants is an easy, smart way to keep them healthy and thriving without daily hassle. In this guide, you’ll learn simple, budget-friendly methods to create your own self-watering planters using items you probably already have at home.
By the end, you’ll feel confident setting up a system that saves you time, reduces water waste, and keeps your green friends happy—even when you’re busy or away. Ready to make watering worry-free? Let’s dive in!

Credit: www.prettypurpledoor.com
Materials Needed
Creating self-watering containers requires a few simple materials. These materials help keep your plants hydrated without daily watering. Choose items that are easy to find and safe for plants. Preparing the right materials is the first step to success.
Common Containers
Use plastic bottles, old jars, or pots with holes. Recycled containers work well and save money. A larger container holds the water reservoir. The smaller container fits inside or above it. Choose containers that fit your plant size.
Tools Required
You need a drill or sharp knife to make holes. Scissors or a cutter help cut wicking material. A marker can mark where to cut or drill. Gloves protect your hands during the process. Have a ruler to measure water levels accurately.
Wicking Materials
Use cotton ropes, strips of cloth, or nylon strings. The wick draws water up to the soil slowly. Avoid synthetic materials that do not absorb water well. The wick should be long enough to reach water and soil. Natural fibers work best and keep plants healthy.

Credit: www.instructables.com
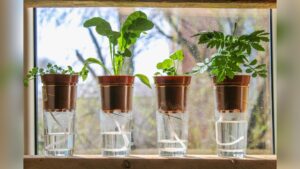
Preparing The Container
Preparing the container is a key step in making a self-watering planter. It ensures your plants get the right amount of water without constant care. Proper preparation helps avoid waterlogging and root rot. Follow these simple steps to get your container ready for self-watering.
Cleaning And Cutting
Start by cleaning your container thoroughly. Remove any dirt, labels, or residues inside and outside. Use warm soapy water for best results. Rinse well and let it dry completely. Cutting the container depends on its type. For plastic bottles, cut them in half to create two parts. The top half will hold the plant, and the bottom half will serve as the water reservoir.
Creating Water Reservoir
The bottom part of the container acts as the water reservoir. Make sure it is deep enough to hold enough water for your plants. Avoid containers that are too shallow. The reservoir should be clean and free of cracks. This part stores water, which will slowly reach the plant’s roots through a wick or soil.
Adding Drainage
Drainage is essential to prevent water buildup. Drill or poke small holes in the bottom of the top container. These holes allow excess water to flow into the reservoir below. Proper drainage keeps roots healthy and prevents mold. Ensure the holes are not too large to avoid soil falling through.
Wick System Setup
Setting up a wick system is a simple way to keep your plants hydrated consistently. This system uses a wick to draw water from a reservoir to the soil. It helps plants absorb water as they need it, preventing overwatering or drying out.
The wick system works quietly and efficiently. It is perfect for busy gardeners or those who travel often. Creating this system requires just a few steps to ensure steady water flow to your plants.
Choosing The Right Wick
Select a wick made from absorbent material like cotton, nylon, or polyester. The wick should be thick enough to carry water but thin enough to fit through your container’s drainage hole. Avoid materials that degrade quickly or do not hold water well. Test your wick by soaking it in water to see how much it absorbs. Choose a wick length that reaches from the water reservoir to the soil comfortably.
Inserting The Wick
Start by making a hole at the bottom of the plant container or use an existing drainage hole. Thread one end of the wick through this hole. The wick’s end inside the soil should be buried a few inches deep to reach the roots. The other end must hang into the water reservoir below the container. Make sure the wick stays in place and does not move out of the soil or water. This setup allows water to flow steadily to the plant’s roots.
Ensuring Proper Water Flow
Check that the wick is moist before placing the plant on the reservoir. Water flows through the wick by capillary action, so it needs to stay wet. Avoid kinks or twists in the wick as they block water flow. Monitor the system for the first few days to see if the soil stays damp but not soaked. Adjust wick thickness or length if water is not reaching the soil properly. Keep the reservoir filled with water to maintain continuous hydration for your plant.

Credit: www.youtube.com
Drip System Setup
Setting up a drip system is a key step in making self-watering containers. It controls water flow to your plants. This method helps keep soil moist without overwatering. You only need a few simple materials, such as plastic bottles and small tools. The drip system gently releases water, making sure plants get enough hydration over time.
Modifying Bottle Caps
Start with clean plastic bottle caps. Use a sharp needle or pin to make small holes. The holes should be tiny to control water drip speed. Test by dripping water on a plate. Adjust hole size if water flows too fast or too slow. A few small holes work better than one big one.
Filling And Positioning
Fill a clean plastic bottle with water. Screw the modified cap tightly on the bottle. Invert the bottle and place it into the soil near the plant roots. The bottle neck should be buried slightly to keep it stable. Position it so water drips directly into the soil, not on leaves.
Securing The Drip System
Use sticks or garden stakes to hold the bottle in place. Push the stakes into the soil beside the bottle. Tie the bottle neck gently to the stakes with string or rubber bands. This stops the bottle from tipping or moving. Check the drip system regularly to ensure steady water flow.
Planting And Maintenance
Planting and maintenance are key steps for healthy growth in self-watering containers. Proper care helps plants thrive with less effort. Follow these simple tips to get started and keep your plants happy.
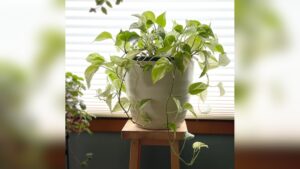
Selecting Suitable Plants
Choose plants that like consistent moisture. Herbs, lettuce, and some flowers work well. Avoid plants needing dry soil or very deep roots. Pick small to medium-sized plants for best results.
Filling Soil And Planting
Use light, well-draining soil for easy water flow. Fill the container with soil, leaving space for roots. Plant your chosen plants gently, covering roots fully. Press soil lightly to remove air pockets.
Refilling Water Reservoir
Check the water level regularly to keep roots moist. Refill the reservoir before it runs dry. Use clean water to prevent mold and bacteria. Keep an eye on water levels during hot days.
Tips For Success
Creating self-watering containers is a smart way to keep plants healthy. Success depends on a few key practices. These tips help your plants thrive and save water. Follow simple steps to maintain the right moisture level and avoid common mistakes.
Monitoring Soil Moisture
Check the soil moisture regularly. Use your finger to feel the soil about an inch deep. If it feels dry, refill the water reservoir. Avoid waiting too long to check. This simple habit keeps plants happy and prevents stress.
Avoiding Overwatering
Overwatering is a common problem with self-watering containers. Make sure the water reservoir does not overflow. The soil should stay moist, not soaked. Too much water can cause root rot and damage the plant. Keep an eye on water levels daily.
Adjusting For Different Plants
Different plants need different amounts of water. Succulents require less water than tropical plants. Adjust the size of the water reservoir to fit each plant’s needs. Learn about your plants to give them the best care. This helps them grow strong and healthy.
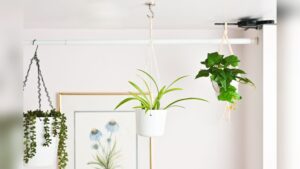
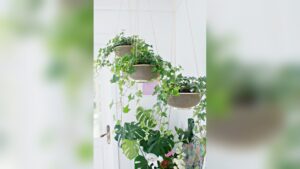
Creative Variations
Creative variations in self-watering containers make gardening fun and practical. These options use simple materials to build effective systems. Each method fits different spaces and plant types. Explore ideas that suit your needs and style.
Using Pvc Pipes
PVC pipes offer a sturdy base for self-watering containers. Cut sections of pipe to create reservoirs for water. Place them inside or beside your plant pots. The pipes slowly release water to the soil through small holes or wicks. This method works well for vertical gardens or tight spaces.
Repurposing Household Items
Old bottles, jars, and containers can turn into self-watering pots. Cut plastic bottles in half and invert the top part as a water reservoir. Use fabric or string as a wick to draw water up to the soil. This approach saves money and reduces waste. It also gives each planter a unique look.
Decorative Options
Combine function and style by choosing decorative containers for self-watering systems. Use colorful pots or paint plain containers for a fresh look. Add natural materials like cork or bamboo as part of the design. These choices brighten your space and keep plants healthy with minimal effort.
Vacation Watering Solutions
Leaving plants unattended during vacation can stress them without proper watering. Self-watering containers offer simple solutions for keeping plants hydrated. These containers slowly release water, ensuring plants stay healthy. Creating your own self-watering system saves money and time. It also suits various plant types and container sizes.
Setting Up Before Leaving
Start by watering your plants well a day before departure. Choose containers with a built-in water reservoir or make your own. Use a plastic bottle or PVC pipe to create a water source beneath the soil. Insert a wick to draw water upward to the roots. Test the system for at least a day to confirm water flow. Place containers in indirect sunlight to reduce water loss. Avoid fertilizing right before leaving to prevent plant stress.
Long-term Watering Ideas
For longer trips, combine self-watering with other methods. Group plants together to create a microclimate that holds humidity. Use mulch on soil surfaces to reduce evaporation. Consider drip irrigation kits with timers for precise watering. Automated systems suit larger collections or outdoor gardens. Regularly check and maintain your watering setup between trips. These ideas help plants stay healthy for weeks without attention.
Frequently Asked Questions
Can You Make Your Own Self-watering Planter?
Yes, you can make your own self-watering planter using recycled bottles or containers with a wick or drip system.
How Can I Automatically Water My Plants While On Vacation?
Use self-watering systems like drip bottles or wick planters. Fill water bottles with holes, invert, and place in soil. Smart irrigation timers and automated sprinklers also keep plants hydrated during vacation.
How To Make Self-watering Bottles For Plants?
Cut a plastic bottle in half and invert the top into the bottom. Insert a wick through the cap to draw water from the reservoir to the soil, providing consistent moisture to the plant.
What Are The Drawbacks Of Self-watering Pots?
Self-watering pots can cause root rot from overwatering and may limit oxygen to roots. They require regular maintenance and may not suit all plant types.
Conclusion
Making self-watering containers saves time and keeps plants healthy. These containers deliver water slowly and evenly. You only need simple materials and basic steps. This method helps plants stay hydrated longer. It also reduces the risk of overwatering or underwatering.
Self-watering containers work well indoors and outdoors. Try making one to see how easy it is. Your plants will thank you with better growth. Start today and enjoy a greener space with less effort.