How to Make Self Watering Bottle for Plants
Are you tired of constantly worrying about watering your plants, especially when life gets busy or you’re away? What if you could create a simple, budget-friendly device that waters your plants automatically, keeping them healthy and thriving without daily effort?
Making your own self-watering bottle is easier than you think—and it’s a smart solution to ensure your plants get just the right amount of water, right when they need it. In this guide, you’ll learn step-by-step how to turn an ordinary bottle into a reliable self-watering system for your plants.
Keep reading, and discover how this small DIY trick can save you time, water, and stress while helping your green friends flourish.

Credit: m.youtube.com
Materials Needed
Gathering the right materials is the first step to create a self-watering bottle for your plants. The materials must be simple and easy to find. This ensures the project stays budget-friendly and effective. Each item plays a key role in building a system that delivers water slowly and steadily. Below are the main materials needed to start.
Choosing The Right Bottle
Select a plastic bottle that holds enough water for your plant size. A 500ml or 1-liter bottle works well for most houseplants. Clear bottles help you see the water level easily. Avoid bottles with labels that are hard to remove. A bottle with a wide neck makes filling easier. Recycled soda or water bottles are perfect choices.
Tools For Making Holes
You need tools to create small holes for water flow. A sharp needle or a small nail works well for this. A heated pin can make cleaner holes in plastic bottles. Use pliers to hold the needle safely while heating. A drill with a small drill bit is another option. Make sure the holes are not too big to prevent fast water loss.
Optional Support Supplies
Some extra supplies can help keep your self-watering system stable. Cotton wicks or strips of cloth help control water release. A small piece of sponge can act as a filter at the bottle neck. Tape or glue can secure the wick inside the bottle. Stakes or sticks help keep the bottle upright in the soil. These items improve the system but are not always necessary.
Preparing The Bottle
Preparing the bottle is the first step in making a self-watering system for your plants. The bottle must be clean and ready to allow water to flow slowly to the soil. This process helps the plant get water without overwatering or constant attention.
Cleaning The Bottle
Start by rinsing the bottle with warm water. Remove any labels or stickers to avoid mold growth. Use a small brush or sponge to scrub the inside and outside. Clean bottles help prevent bacteria from harming your plants.
Making Holes In The Cap
Use a sharp tool like a nail or needle to make small holes in the bottle cap. These holes will let water drip slowly into the soil. Make sure the holes are not too big to avoid fast water flow. Two or three tiny holes usually work best.
Alternative Hole-making Methods
If you do not have a nail or needle, try other ways. Heat a pin or paperclip over a flame and carefully push it through the cap. You can also use a small drill or a thumbtack to make holes. Always be careful to avoid injury during this step.
Filling And Sealing
Filling and sealing the self-watering bottle is a key step in creating an effective plant watering system. Proper filling ensures your plant gets enough water over time. Sealing the bottle correctly prevents water loss and keeps the system working smoothly. Follow these simple steps for best results.
Filling With Water
Fill the bottle with clean, room temperature water. Avoid overfilling to leave some air space. This air helps regulate water flow to the plant roots. Use a funnel for easier pouring and less mess. Stop filling when the water reaches about an inch below the neck.
Securing The Cap
Place the cap tightly on the bottle to avoid spills. If your bottle has a screw cap, twist it firmly until it is snug. For bottles without caps, use a cork or a small piece of cloth secured with a rubber band. This stops dirt from entering while allowing slow water release.
Ensuring No Leaks
Check the bottle for leaks before placing it in the soil. Hold the bottle upside down over a sink or towel. Watch for any water drops escaping from the cap or bottle holes. Fix leaks by tightening the cap or sealing gaps with waterproof tape. A leak-free bottle keeps water where your plant needs it most.
Installing The Bottle
Installing the bottle correctly is key for your self-watering system to work well. The bottle must release water slowly into the soil near the plant roots. This ensures plants get the right amount of moisture over time.
Place the bottle so it stays stable and the water flows without leaking. Follow simple steps to position the bottle well in your plant pot or garden bed.
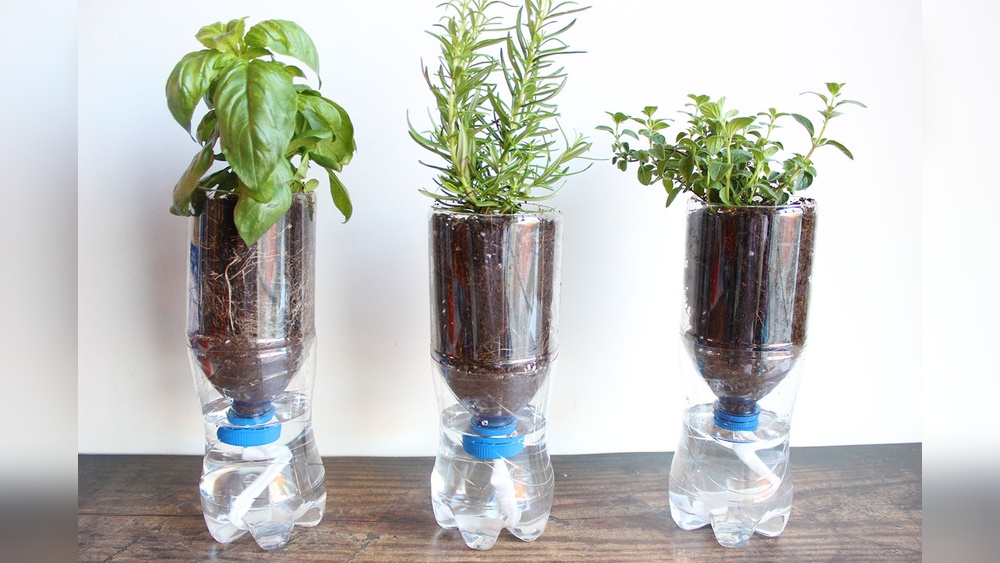
Inverting The Bottle
Turn the bottle upside down so the opening faces downwards. This allows water to drip slowly into the soil. Make sure the bottle cap is removed or has small holes for water flow. The inverted bottle acts as a tiny reservoir.
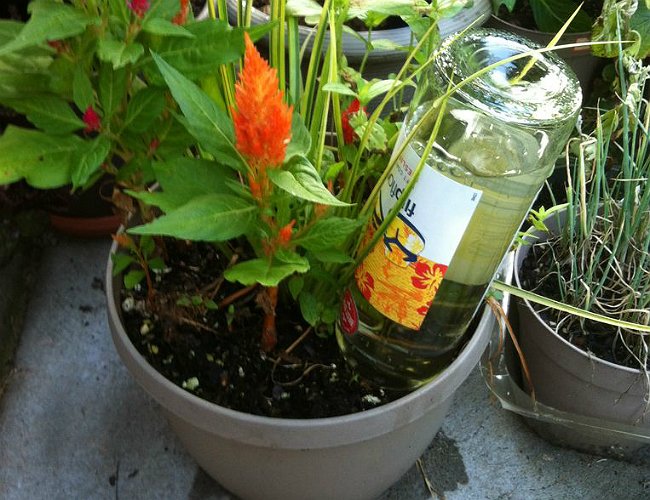
Inserting Into Soil
Push the neck of the bottle gently into the soil near the plant roots. Insert it deep enough to stay upright and deliver water directly to the root zone. Avoid placing it too close to the stem to prevent rot. The soil should hold the bottle firmly without tipping.
Using Stakes For Stability
Use garden stakes or sticks to hold the bottle in place. Tie the bottle gently to the stake to stop it from falling over. This is especially useful for larger bottles or outdoor plants exposed to wind. Stakes keep the watering system steady and effective.
Adjusting For Different Plants
Adjusting a self-watering bottle for different plants ensures each one gets the right amount of water. Plants vary in size, location, and soil needs. These factors affect how much water your self-watering system should deliver. Customizing your setup helps plants thrive and prevents overwatering or underwatering.
Small Vs. Large Plants
Small plants need less water than large plants. Use smaller bottles for tiny plants to avoid waterlogging. Large plants require more water, so use bigger bottles or multiple bottles. Place the bottle neck deeper in large pots to reach the roots better. Monitor the soil to adjust water flow as needed.
Indoor Vs. Outdoor Usage
Indoor plants usually need less water because of stable temperatures. Use smaller bottles indoors and check soil moisture often. Outdoor plants face sun, wind, and rain, which affect water needs. Use larger bottles outdoors and protect the bottle from strong winds. Adjust watering frequency based on weather changes.
Soil Moisture Considerations
Different soils hold water differently. Sandy soil drains quickly and needs more water. Clay soil holds water longer, so use less water in the bottle. Check soil moisture before adding water to avoid soggy roots. Adjust the bottle’s drip rate by changing the hole size or using cotton for slow release.
Maintaining The System
Maintaining your self-watering bottle system is key to keeping your plants healthy and hydrated. Regular care ensures the system works efficiently and prevents issues like mold or clogging. Simple steps can extend the life of your setup and promote strong plant growth.
Refilling Water
Check the water level in the bottle every few days. Refill the bottle before it runs completely dry. Use clean, fresh water to avoid harmful buildup. Keeping the water topped up ensures your plant gets a steady supply.
Cleaning The Bottle
Empty the bottle and rinse it with warm water once a month. Remove any dirt, algae, or mold inside the bottle. Use a soft brush to clean hard-to-reach areas. Clean bottles prevent blockages and keep water flowing smoothly.
Monitoring Plant Health
Watch your plant’s leaves and soil closely. Yellow or drooping leaves can signal overwatering or underwatering. Adjust the water flow by changing the bottle’s position or size of the opening. Healthy leaves and moist soil mean the system is working well.
Troubleshooting Common Issues
Building a self-watering bottle for your plants is simple and effective. Sometimes small problems can stop it from working well. Fixing these common issues keeps your plants healthy and happy. Below are ways to solve some frequent problems.
Bottle Tipping Over
One common problem is the bottle tipping over. It can spill water and make a mess. Use a heavier bottle or fill the bottle with some sand before adding water. Place the bottle deep into the soil for better support. Surround the bottle with small stones to keep it steady. These tips help keep your watering system in place.
Water Flow Problems
Water may not flow properly from the bottle. This can happen if the bottle hole is too small or blocked. Make sure the hole is wide enough for water to drip slowly. Clear any dirt or debris that may block the hole. Sometimes air cannot enter the bottle, causing a vacuum. Add a small air hole near the top to fix this. Proper flow keeps the soil moist without flooding.
Preventing Mold And Algae
Mold and algae grow in wet conditions and can harm plants. Use clean water and change it regularly. Place the bottle where it gets some sunlight to reduce mold growth. Clean the bottle every few weeks to remove algae buildup. Avoid overwatering, as constant wet soil encourages mold. These steps keep your self-watering bottle clean and safe for plants.
Benefits Of Self-watering Bottles
Self-watering bottles offer many advantages for plant care. They provide a steady water supply directly to the roots. This method helps plants stay hydrated without daily watering. Using self-watering bottles can save time, water, and effort. The benefits make these simple tools a great choice for gardeners of all skill levels.
Water Conservation
Self-watering bottles reduce water waste significantly. Water goes straight to the plant roots. This prevents evaporation and runoff. Less water is needed compared to traditional watering. This method helps save water, especially in dry areas. It also supports sustainable gardening practices.
Convenience For Vacations
Self-watering bottles keep plants watered during absences. They slowly release water over several days. This means plants stay healthy while you are away. No need to ask others to water for you. It works well for short trips or long vacations. Your plants remain fresh without daily care.
Improved Plant Growth
Consistent watering helps plants grow stronger and healthier. Roots receive moisture evenly, which supports steady growth. It reduces stress caused by dry spells or overwatering. Plants develop better root systems with regular hydration. This promotes vibrant leaves and flowers. Self-watering bottles create ideal conditions for plant health.
Creative Variations
Creative variations can enhance your self-watering bottle project. Experimenting with different ideas helps fit your plant’s needs better. Each variation changes how water reaches the roots. It can improve efficiency and plant health.
Using Different Bottle Types
Plastic bottles are common, but glass or metal bottles work too. Glass bottles keep water cooler and last longer outdoors. Metal bottles can add style but may heat water faster. Choose bottle size based on your plant’s water needs. Smaller plants need smaller bottles, larger plants need bigger ones. Try using colored bottles to reduce light exposure and slow algae growth.
Adding Fertilizer To Water
Mix a small amount of liquid fertilizer into the water. This feeds plants slowly and evenly. Use diluted fertilizer to avoid burning roots. Make sure the fertilizer is water-soluble and safe for your plants. This method saves time and gives nutrients regularly. Change the water-fertilizer mix every few weeks to keep it fresh.
Combining With Other Irrigation Methods
Self-watering bottles work well with drip irrigation or capillary mats. Combine methods for consistent moisture without overwatering. Drip irrigation adds water drop by drop for precision. Capillary mats let plants absorb water from below. Use self-watering bottles to fill these systems or as a backup water source. This mix keeps plants healthy during dry periods or trips.
Credit: www.bobvila.com

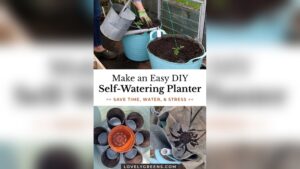
Credit: sagesacre.com
Frequently Asked Questions
How To Make Your Own Self-watering Bottle For Plants?
Fill a plastic bottle with water and poke small holes in its cap. Invert and bury the neck into the soil near the plant’s roots. The water slowly drips, keeping soil moist and plants hydrated automatically.
How Can I Automatically Water My Plants While On Vacation?
Use a water bottle with small holes in the cap, fill it with water, and invert it into your plant’s soil before leaving. This DIY self-watering method slowly releases water, keeping plants hydrated during vacation without daily care.
How Do You Make Homemade Self Watering Hacks?
Make self-watering hacks by puncturing holes in a bottle cap, filling it with water, and inverting it into soil near plants. Support the bottle to prevent tipping. This slowly releases water, keeping plants hydrated for days without daily watering.
How To Make Your Own Plant Watering Globes?
Make small holes in a bottle cap, fill the bottle with water, and invert it into the soil near your plant’s base.
Conclusion
Creating a self-watering bottle for your plants saves time and effort. This simple tool helps keep soil moist longer. It uses basic materials you likely have at home. The bottle slowly releases water directly to the roots. This method supports healthy plant growth and reduces overwatering.
Anyone can make one with easy steps. Try it today and watch your plants thrive with less work.