How to Make Automatic Watering System for Plants: Easy DIY Guide
Do you ever worry about forgetting to water your plants or wish there was an easier way to keep them healthy and thriving? Imagine having a system that waters your plants automatically, giving them just the right amount of moisture without you lifting a finger.
Creating your own automatic watering system is simpler than you think, and it can save you time, water, and stress. In this guide, you’ll learn step-by-step how to build an efficient watering setup that fits your plants’ needs perfectly. Ready to make your plant care routine effortless and smart?
Let’s dive in!
Materials Needed
Gathering the right materials is the first step to build an automatic watering system for plants. This ensures the system works smoothly and lasts long. A simple setup can be done with basic tools and watering parts. For advanced control, optional electronics can be added. Below is a list of materials needed for each part of the system.
Basic Tools
- Scissors or garden shears for cutting tubing
- Drill with small drill bits for holes
- Screwdriver for securing parts
- Measuring tape to measure tubing lengths
- Marker to mark cutting points
Watering Components
- Plastic tubing or drip irrigation hose
- Drip emitters or micro-sprinklers
- Water reservoir or container
- Connectors and tees for tubing
- Valve to control water flow
Optional Electronics
- Timer to schedule watering times
- Soil moisture sensor for smart watering
- Electric water pump for pressure control
- Microcontroller (like Arduino) for automation
- Power supply or batteries

Credit: projecthub.arduino.cc
Choosing A Water Source
Choosing the right water source is key to building an automatic watering system. It affects how well your plants get water and how easy the system is to maintain. Some methods suit small indoor plants, while others work better for gardens. Consider your plant type, water availability, and system size.
Here are simple ways to pick a water source for your automatic watering setup.
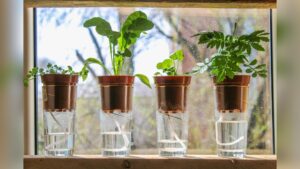
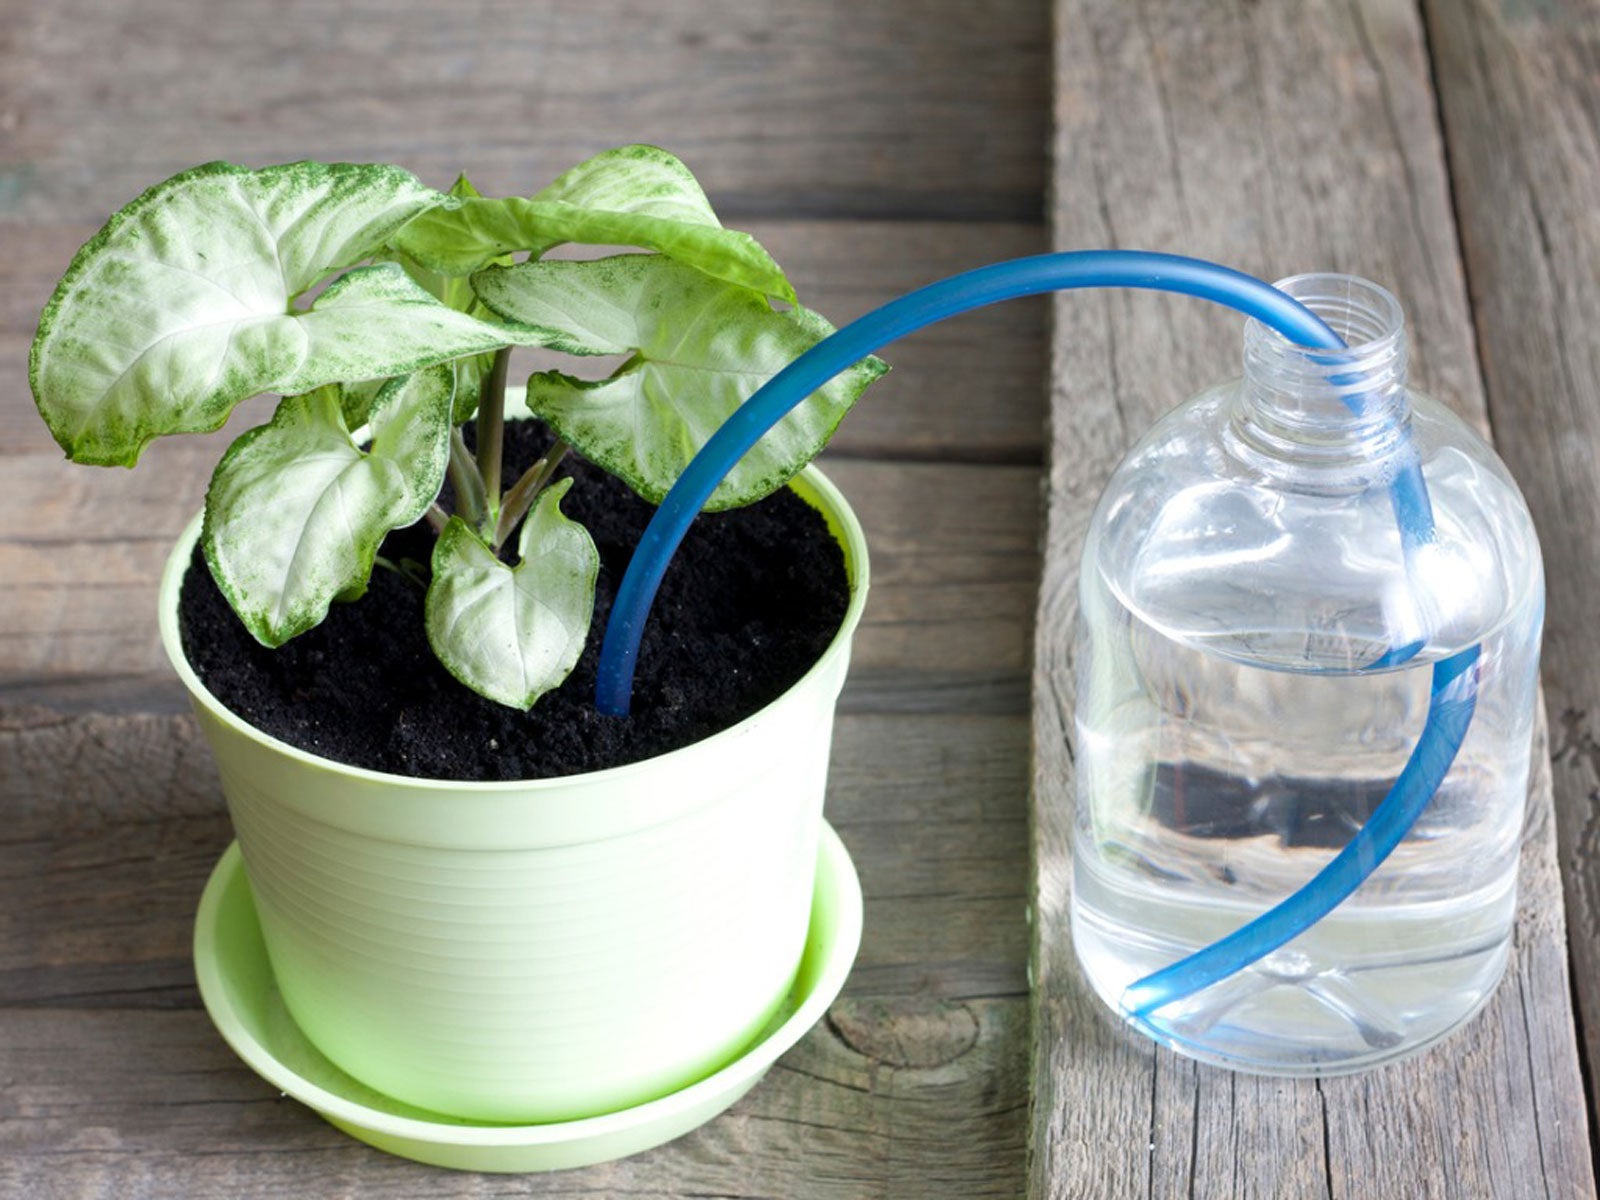
Using Bottles
Plastic bottles make a cheap and easy water source. Drill small holes near the top of the bottle. Fill it with water and turn it upside down. Push the bottle neck into the soil near your plant. Water slowly drips into the soil, keeping it moist.
This method works well for pots and small garden beds. Bottles are easy to refill and move as needed.
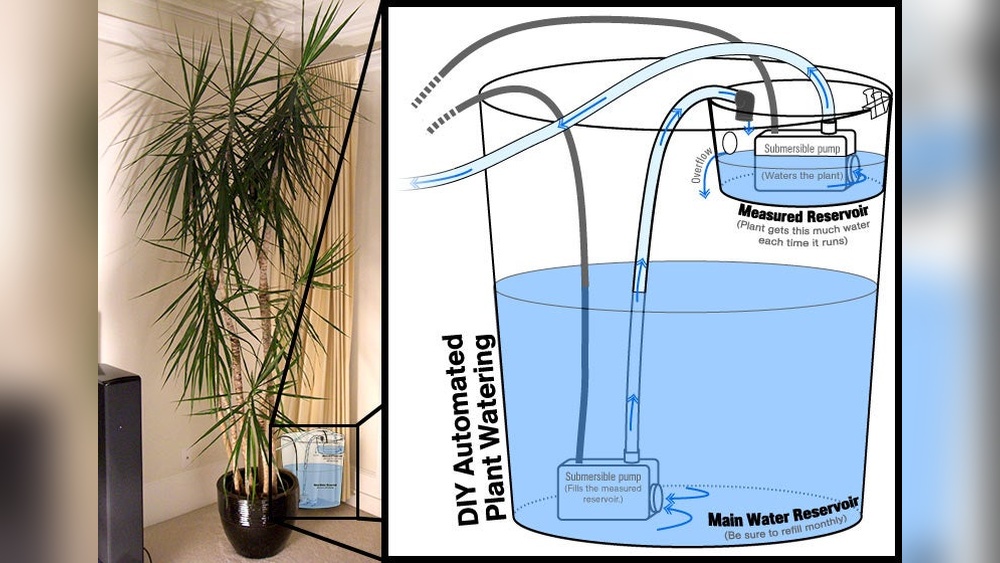
Connecting To Water Tanks
Water tanks hold more water and suit bigger gardens. Connect tubes from the tank to your watering system. Use a pump or gravity to move water to plants. Tanks can collect rainwater, saving tap water and money.
This setup needs more parts but offers steady water supply. Check the tank regularly and keep it clean to avoid blockages.
Tap Water Setup
Using tap water provides a constant and reliable source. Attach tubing directly to an outdoor faucet. Add a timer to control watering times automatically. This setup is ideal for home gardens and larger plants.
Make sure to install filters to prevent debris from clogging the system. Turn off the water source during winter to avoid pipe damage.
Setting Up The Drip System
Setting up the drip system is a key step in creating your automatic watering system. It controls how water reaches each plant slowly and steadily. This method saves water and keeps soil moist without flooding. Follow these easy steps to build a reliable drip system using simple materials.
Drilling And Preparing Bottles
Use clean plastic bottles for water containers. Drill small holes near the bottle caps to allow water to drip out. Make the holes small to control the water flow. Test the bottle by filling it with water and turning it upside down. Adjust hole size if water drips too fast or too slow.
Arranging Drip Lines
Place the bottles next to each plant or group of plants. Use thin tubing or small pipes to guide water from the bottles to the soil. Arrange the tubing so it reaches the base of each plant. Keep tubing straight and avoid kinks to ensure smooth water flow. Position bottles higher than the plants for better gravity flow.
Securing Tubing
Use stakes or clips to hold the tubing in place. Secure tubing at each plant to prevent movement. Make sure tubing openings stay near the soil surface for slow watering. Check all connections for leaks and tighten if needed. Proper securing keeps water directed only to the plant roots.
Credit: www.gardeningknowhow.com
Adding Automation
Adding automation to your plant watering system saves time and keeps plants healthy. Automated watering ensures plants get water regularly, even when you are busy or away. It reduces the risk of overwatering or underwatering. There are simple ways to add automation using basic tools and technology.
Using Timers
Timers control when and how long water flows to your plants. You can use garden hose timers or electronic timers for drip irrigation. Set the timer to water plants at specific intervals, like early morning or evening. This method works well for consistent watering without manual effort. Timers are affordable and easy to install on most watering systems.
Incorporating Moisture Sensors
Moisture sensors detect soil wetness and trigger watering only when needed. These sensors prevent watering dry soil or flooding wet soil. Place the sensor near plant roots for accurate readings. When soil moisture drops below a set level, the sensor activates the water supply. This method saves water and keeps plants healthier by matching their needs.
Microcontroller Integration
Microcontrollers like Arduino or Raspberry Pi add smart control to your watering system. They connect with sensors and timers to automate watering fully. You can program them to water based on time, soil moisture, or weather data. Microcontrollers allow custom settings and alerts for your plants’ needs. This approach is flexible and suitable for tech-savvy gardeners wanting full control.
Programming Your System
Programming your automatic watering system is a key step to keep your plants healthy. It controls when and how much water your plants get. Proper programming saves water and prevents overwatering or underwatering. This section guides you through setting up your system for the best results.
Basic Timer Settings
Start by setting the timer on your watering controller. Choose the time of day to water your plants. Early morning or late evening works best to reduce evaporation. Set how long each watering session will last. Keep sessions short to avoid water waste. Set the number of times per day or week your system will run. Check the timer regularly to make sure it is working correctly.
Sensor Calibration
Sensors help your system water plants only when needed. Calibrate soil moisture sensors before use. Insert the sensor in moist soil and note the reading. Then place it in dry soil and record that value. Set the sensor threshold to trigger watering between these values. Test the sensor in your garden to ensure accurate readings. Proper calibration prevents watering when soil is already wet.
Customizing Watering Schedules
Adjust watering schedules based on plant type and season. Some plants need more water, others less. Increase watering during hot, dry weather. Reduce watering during rainy days or cooler seasons. Use multiple zones if your system supports it. Each zone can have its own schedule for different plant groups. Tailoring schedules improves plant health and conserves water.
Installation Tips
Proper installation is key to making an automatic watering system work well. Simple steps during setup can save time and prevent plant problems. Follow these tips to place and adjust your system carefully. They help water reach plants just right. Avoid common issues like water pooling or root rot. A good start means healthy plants and less maintenance.
Positioning Near Plants
Place watering tubes close to plant roots. Water travels best near the base of each plant. Avoid putting emitters too far from roots. This can cause dry spots or wasted water. Check plant size and spread before installation. Adjust emitter placement as plants grow. This keeps water flowing where it is needed most.
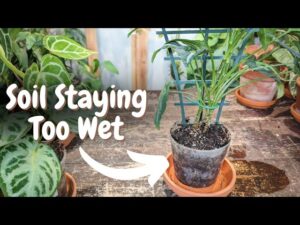
Ensuring Proper Drainage
Check soil drainage before adding the system. Water must soak in quickly without pooling. Poor drainage leads to root rot and weak plants. Use well-draining soil or add sand to heavy clay. Position emitters slightly above the soil line. This helps prevent water buildup around roots. Regularly inspect the system for clogs or leaks. Clear any blockages fast to keep water flowing.
Avoiding Overwatering
Set your system to water in short, frequent bursts. Long watering sessions can drown roots and waste water. Use a timer or moisture sensor to control watering times. Watch plants for signs of overwatering, like yellow leaves. Adjust your system based on weather and plant needs. Proper watering keeps plants healthy and reduces fungal risks.
Maintenance And Troubleshooting
Maintaining your automatic watering system keeps plants healthy and system running smoothly. Regular checks prevent common issues and save water. Troubleshooting helps fix small problems fast. This avoids damage to plants and system parts.
Checking For Clogs
Clogs block water flow and stop plants from getting enough water. Check tubes and nozzles for dirt or mineral buildup. Remove any debris by flushing with clean water. Use a thin wire or needle to clear small holes. Regular cleaning ensures steady water delivery to all plants.
Replacing Batteries
Battery power keeps timers and pumps working. Weak batteries cause the system to stop or water irregularly. Check battery level every month. Replace batteries with fresh ones as needed. Use high-quality batteries for longer life and reliable operation.
Adjusting Water Flow
Water flow control prevents under or over watering. Adjust valves or drip emitters to change flow rate. Test by running the system and observing water output. Fine-tune flow to match plant size and soil type. Proper flow helps plants absorb water without waste.
Benefits Of Automatic Watering
Automatic watering systems offer several important benefits for plant care. They make watering easier, save water, and help plants stay healthy. These systems work by delivering water regularly without needing much attention. This means plants get just the right amount of water at the right time. Automatic watering is useful for busy gardeners and those who travel often.
Saving Time And Effort
Automatic watering cuts down the time spent on daily plant care. It removes the need to water plants by hand. This frees up time for other tasks or relaxation. The system works on its own, so you do not have to remember watering schedules. It also reduces the effort needed to maintain a garden, making plant care less tiring.
Consistent Plant Care
Plants need water regularly to grow well. Automatic systems provide consistent watering without missing a day. This helps plants avoid stress caused by too much or too little water. Consistent moisture supports healthy root growth and lush leaves. Plants become stronger and more resistant to pests and disease with steady watering.
Water Conservation
Automatic watering systems use water efficiently by delivering it directly to the plant roots. This reduces water waste from evaporation or runoff. Timed watering ensures plants get only what they need. This approach saves water and lowers water bills. It also helps protect the environment by reducing overall water use in gardening.
Adapting For Different Plants
Adapting an automatic watering system to suit different plants is key for healthy growth. Each plant type has unique water needs. Adjusting the system ensures every plant gets just the right amount of water. This prevents overwatering or drought stress. It also helps save water and keeps your garden thriving.
Adjusting Water Amounts
Different plants need different water amounts. Succulents require less water than flowering plants. Set your system to deliver small drips for drought-tolerant plants. Increase water flow for thirsty plants like ferns. Use adjustable valves or timers to control water volume. This customization keeps plants healthy and happy.
Scheduling For Plant Types
Watering schedules depend on plant species. Some plants need daily watering, others only once or twice a week. Group plants with similar needs together. Set the timer to water each group at the right frequency. This saves water and prevents root rot. Scheduling by plant type helps maintain balanced moisture levels.
Seasonal Modifications
Plants need more water in hot, dry seasons. Reduce watering during cooler, wetter months. Adjust your automatic system as seasons change. Increase watering time or frequency in summer. Decrease it in winter to avoid soggy soil. Seasonal tweaks keep plants healthy year-round and reduce water waste.

Credit: www.youtube.com
Frequently Asked Questions
Can I Build My Own Automatic Watering System?
Yes, you can build your own automatic watering system using simple materials like water bottles, tubing, and timers. It saves time and ensures consistent plant hydration.
How Can I Automatically Water My Plants While On Vacation?
Use a drip irrigation system or self-watering spikes connected to a timer. Fill water bottles with holes for slow release. Smart plant sensors with app control also automate watering efficiently during vacations.
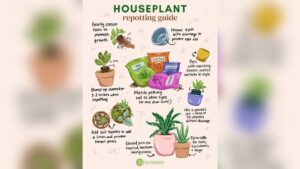
What Is The 1/2/3/2:1 Watering Method?
The 1/2/3/2:1 watering method means watering plants deeply once, then half, then one and a half times, promoting healthy root growth.
How To Make A Smart Plant Watering System?
Create a smart plant watering system using a soil moisture sensor, microcontroller, and water pump. Program it to water plants automatically when soil is dry. Connect components with wires, and power the system with a battery or adapter. Test and adjust settings for optimal watering.
Conclusion
Building your own automatic watering system saves time and effort. It keeps plants healthy by giving water regularly and correctly. You control how much and when plants get water. This system helps during busy days or vacations. Start with simple materials and adjust as needed.
Watch your plants grow strong and green with ease. Try it today and enjoy gardening without worry.