How to Make a Self Watering Plant Pot: Easy DIY Guide
Do you often forget to water your plants or worry about them drying out while you’re away? Imagine having a plant pot that waters itself, keeping your green friends happy and healthy without constant attention.
Making a self-watering plant pot is easier than you think, and it can save you time and stress. In this guide, you’ll learn simple steps to create your own self-watering planter using everyday materials. By the end, you’ll have a clever setup that keeps your plants hydrated and thriving—no more guesswork or daily watering needed.
Ready to make your plant care routine effortless? Let’s get started!
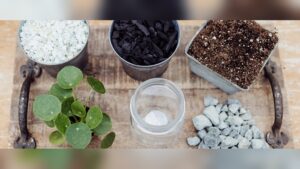
Materials Needed
To create a self-watering plant pot, gather the right materials first. These materials ensure your plant gets steady water supply without daily attention. Choosing suitable containers, wicking materials, and tools is key for success. Prepare each item before starting your project.
Containers And Sizes
Pick containers that hold both soil and water. A larger pot for soil fits on top of a smaller water reservoir. Use plastic or ceramic pots with drainage holes. Sizes depend on the plant type and space available. Common choices include flower pots, jars, or recycled bottles. Make sure containers fit well together to avoid leaks.
Wicking Materials
Wicks move water from the reservoir to the soil. Use absorbent materials like cotton rope, strips of old cloth, or nylon fabric. The wick should be long enough to reach from water to soil. Avoid synthetic materials that do not absorb water well. The wick keeps soil moist without overwatering your plant.
Tools And Accessories
Basic tools make building easy and safe. Use a sharp knife or scissors to cut wicks and containers. A drill or sharp object helps make drainage holes. Measuring tape or ruler ensures correct sizes. You may need waterproof glue or tape to seal containers. Keep a watering can nearby for filling the reservoir.
Choosing Containers
Choosing the right containers is the first step in creating an effective self-watering plant pot. Containers must work together to store water and keep soil moist. Picking containers with the right size and shape helps plants grow better. This section explains the two main types of containers needed for a self-watering system.
Outer Reservoir Container
The outer container holds the water reservoir. It should be watertight to avoid leaks. A plastic or glass container works well for this part. The size depends on how often you want to refill the water. A larger reservoir means less frequent refilling. Choose a container that is sturdy and easy to clean. Clear containers let you see the water level. Make sure it fits the inner container comfortably inside.
Inner Soil Container
The inner container holds the soil and plant roots. It should have holes at the bottom. These holes allow water to reach the soil from the reservoir. Use a pot made of plastic, ceramic, or metal. The container must fit inside the outer reservoir with some space below. This space holds the water for the plant roots to absorb. The inner container should be easy to remove for cleaning and planting. Choose one that suits the size of your plant.
Creating The Water Reservoir
Creating the water reservoir is a key step in making a self-watering plant pot. The reservoir holds water and supplies it to the plant roots as needed. This design reduces watering frequency and helps plants stay healthy. Building a good reservoir ensures the pot works efficiently and keeps soil moist without overwatering.
Preparing The Outer Container
Choose a container larger than the inner plant pot. It should be waterproof and sturdy. Clean the container to remove dirt and debris. The container will hold the water reservoir. Make sure it fits well under the plant pot without tipping. This outer container acts as the water storage area.
Adding Drainage And Overflow
Drill small holes in the bottom of the inner pot for drainage. These holes allow excess water to flow into the reservoir. Also, add an overflow hole near the top of the outer container. This hole prevents the reservoir from overfilling and flooding. Proper drainage and overflow protect plant roots from waterlogging.

Credit: lovelygreens.com
Building The Wicking System
Building the wicking system is a crucial step for your self-watering plant pot. This system moves water from the reservoir to the soil. It keeps your plant hydrated without daily watering. A simple and effective wicking system uses absorbent materials to transfer water steadily. Careful selection and installation of the wick ensure your plant gets just the right amount of moisture.
Selecting The Wick Material
Choose a wick material that absorbs water well. Cotton rope, nylon, or polyester cords work best. Cotton is natural and holds water efficiently. Nylon and polyester last longer but may hold less water. Avoid materials that break down quickly or repel water. The wick thickness should match your plant size and water needs. Thicker wicks deliver more water, thinner wicks less. Pick a length that reaches from the water reservoir to the soil comfortably.
Installing The Wick
Start by placing one end of the wick into the water reservoir. Make sure it is fully submerged for constant moisture. Insert the other end deep into the soil near the plant roots. This placement helps the plant absorb water easily. Bury the wick at least two inches into the soil for steady water flow. Avoid letting the wick dry out by checking water levels regularly. Secure the wick so it stays in place and doesn’t move out of the soil or water.
Assembling The Planter
Assembling the planter is a key step in creating a self-watering plant pot. This stage sets the foundation for how well your plant will grow. Proper assembly ensures water reaches the roots efficiently and keeps the soil moist without overwatering. Follow these simple steps to build your planter correctly.
Positioning Inner Container
Start by placing the inner container inside the outer pot. This container holds the soil and plant. Make sure it fits snugly but leaves space at the bottom. The space below will serve as the water reservoir. Check that the inner container has holes at the bottom. These holes allow water to move up to the soil.
Separating Soil And Water
Use a barrier to keep soil and water separate inside the planter. A piece of landscape fabric or a plastic screen works well. Place it over the water reservoir but under the soil. This barrier stops soil from falling into the water. It also helps roots access water without becoming waterlogged.
Credit: www.cravingsomecreativity.com
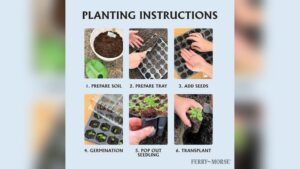
Filling And Planting
Filling and planting a self-watering pot requires care to ensure your plant thrives. Proper soil placement and planting technique help roots reach moisture from the reservoir. This step sets the foundation for healthy growth and easy watering.
Adding Potting Mix
Begin by adding a good quality potting mix into the pot. Use soil that drains well but retains moisture. Fill the pot about halfway, leaving room for your plant’s roots. Gently press the soil to remove air pockets. Avoid packing the soil too tightly to allow root growth.
Planting Your Greenery
Place your plant gently in the pot. Spread the roots out carefully to avoid damage. Add more potting mix around the roots to cover them fully. Press the soil lightly to stabilize the plant. Water the soil lightly so it settles around the roots. Check that the soil level stays below the pot’s rim to keep the water reservoir effective.
Refilling And Maintenance
Refilling and maintenance keep your self-watering plant pot working well. Regular care ensures plants get steady water and stay healthy. Understanding how to refill and check water levels is key to success.
Using The Filling Pipe
Most self-watering pots have a filling pipe for easy water addition. Pour clean water slowly into the pipe to avoid spills. Fill until water reaches the top of the reservoir. Avoid overfilling to prevent root rot or waterlogging.
Use fresh water each time to stop algae or bacteria growth. If dirt blocks the pipe, clean it gently with a thin brush. Keep the pipe clear for smooth water flow.
Checking Water Levels
Check water levels regularly to keep plants hydrated. Many pots include a water level indicator for easy monitoring. Look at the indicator to see if the reservoir needs refilling.
Touch the soil surface to check moisture if there is no indicator. Dry soil means it is time to add water. Wet soil means the reservoir still has water.
Empty and clean the reservoir every few months. This prevents buildup of salts and minerals that harm roots. Clean parts with mild soap and rinse well before refilling.
Tips For Best Results
Achieving the best results with a self-watering plant pot requires attention to a few key details. Proper plant selection and careful watering habits help plants thrive in this setup. Following simple tips ensures your DIY planter works efficiently and keeps your plants healthy.
Choosing Suitable Plants
Pick plants that enjoy consistent moisture but do not like soggy roots. Herbs like basil, mint, and parsley work well. Many houseplants such as pothos, spider plants, and peace lilies adapt nicely to self-watering pots. Avoid plants that prefer dry soil, like succulents or cacti. These plants may suffer from too much moisture in this system.
Avoiding Overwatering
Check the water reservoir regularly to prevent excess water buildup. Overfilling can cause root rot and other problems. Use a soil moisture meter or simply touch the soil to monitor dampness. Allow the soil surface to dry slightly between refills. Proper drainage in your planter design also helps control moisture levels. Balance is key to keeping roots healthy and happy.
Alternative Diy Methods
Alternative DIY methods for making self-watering plant pots offer simple and creative options. These methods use common household items. They save water and reduce the need for frequent watering. Anyone can try these easy solutions at home.
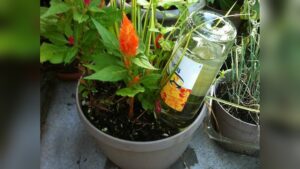
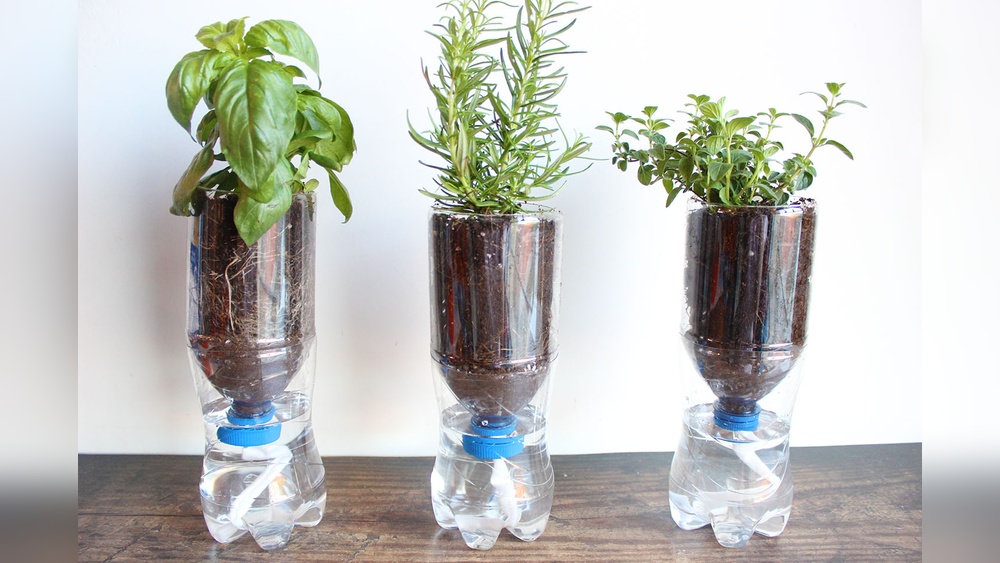
Using Plastic Bottles
Plastic bottles make excellent self-watering devices. Start by drilling small holes near the bottle’s top. Fill the bottle with water. Quickly invert it and push the neck into the soil. The water slowly seeps into the soil, keeping it moist.
This method works well for small to medium-sized pots. It uses recycled materials and takes little time to set up. The bottle acts as a water reservoir, releasing water as the soil dries out.
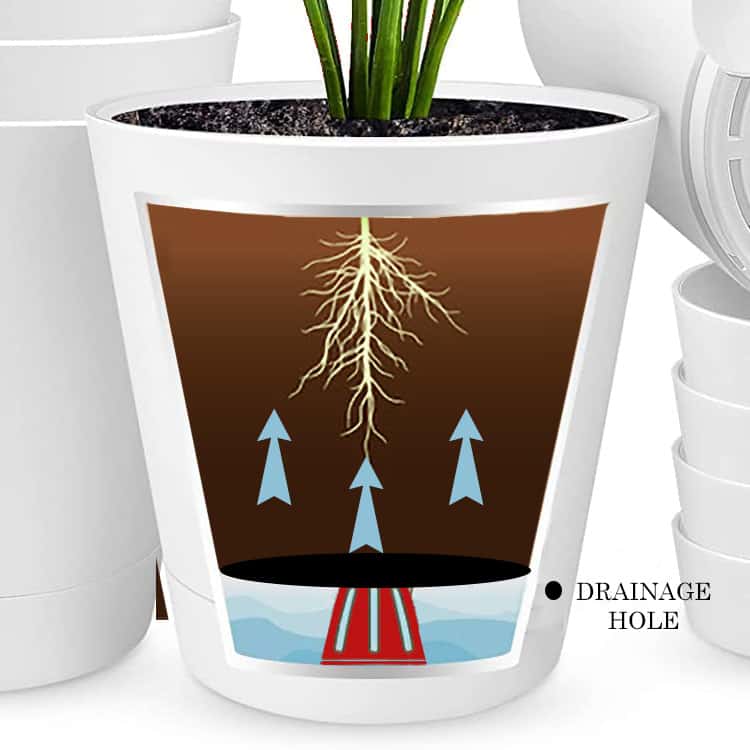
Single Container Solutions
You can create a self-watering pot using just one container. Use a pot with two layers or create a water reservoir at the bottom. Fill the bottom with water, and place a separator with holes above it. Fill the top with soil and your plant.
Water moves up from the reservoir through the soil by capillary action. The soil stays moist without overwatering. This simple design helps plants grow healthy with minimal effort.

Credit: www.reddit.com
Frequently Asked Questions
How To Turn A Normal Pot Into A Self-watering Pot?
To turn a normal pot into a self-watering pot, add a water reservoir below the soil. Use a wick or perforated pipe to connect soil and water. Ensure the reservoir refills easily and keeps soil moist without overwatering.
How Can I Automatically Water My Plants While On Vacation?
Use a self-watering planter or DIY drip system with a water reservoir and wick to hydrate plants automatically during vacations.
What Makes A Plant Pot Self-watering?
A self-watering plant pot has a water reservoir and a wick that delivers moisture from the reservoir to the soil and roots consistently.
How Do You Make Homemade Self Watering System?
Use a plastic bottle with holes in the cap as a water reservoir. Fill it, invert, and insert into soil. The bottle slowly releases water, keeping soil moist without overwatering.
Conclusion
Creating a self-watering plant pot saves time and keeps plants healthy. You only need simple materials and easy steps. This pot helps plants get water slowly and steadily. It reduces the risk of overwatering or underwatering. Try making one to enjoy gardening with less worry.
Your plants will thank you with better growth and fewer problems. Gardening becomes more fun and less stressful this way. Give your plants a steady water supply without daily care. A self-watering pot is a smart addition for any gardener.