How to Make Upside down Hanging Planters
Have you ever wanted to add a fresh, creative touch to your home or garden without taking up floor space? Upside down hanging planters are the perfect solution for you.
They not only save space but also create a stunning visual effect that will catch everyone’s eye. Imagine your favorite plants floating above you, turning any room or outdoor area into a green paradise. In this guide, you’ll discover simple, step-by-step instructions to make your own upside down hanging planters.
Materials Needed
Creating upside down hanging planters is fun and rewarding. Gathering the right materials is the first step. This helps ensure your planter is sturdy and your plants grow well. Choose everything carefully to make the project easier and successful.
Choosing The Right Planter
Pick a planter with a strong base. It must hold soil and plants without leaking. Plastic or metal planters work well. Avoid fragile materials that break easily. The planter should have holes for water drainage. Size matters too; bigger planters hold more soil and support bigger plants.
Essential Tools
Use simple tools for this project. You need scissors or a sharp knife to cut the planter. A drill helps make drainage holes if none exist. String or strong rope is required to hang the planter safely. Gloves protect your hands while working with soil and plants.
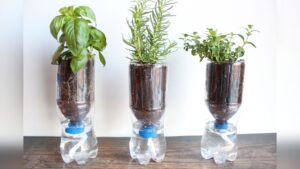
Selecting Suitable Plants
Choose plants that grow well upside down. Herbs like basil and mint are good choices. Small flowers such as petunias and pansies also work. Avoid heavy or large plants that pull too much on the planter. Pick plants that need similar water and light levels.

Credit: www.youtube.com
Preparing The Planter
Preparing the planter is a key step to create a sturdy upside down hanging planter. It ensures your plant stays healthy and your planter lasts long. This process involves cleaning, adding drainage, and decorating. Each step helps the planter work well and look nice.
Cleaning And Drilling
Start by cleaning the planter thoroughly. Remove dirt, dust, and old soil. Use warm water and mild soap. Rinse well and let it dry completely. After cleaning, drill holes for hanging and air flow. Choose a drill bit that fits your hooks or chains. Be careful to avoid cracks while drilling.
Adding Drainage
Drainage is very important for plant health. Drill several small holes at the bottom. These holes allow excess water to escape. Without drainage, roots can rot from too much water. You can add a layer of small stones or pebbles inside. This helps water drain better and keeps soil from washing out.
Painting And Decorating
Painting the planter protects it from weather damage. Use outdoor or waterproof paint for best results. Pick colors that match your style or garden theme. Let the paint dry fully before hanging. Add decorations like stencils or stickers for a personal touch. Keep designs simple to avoid peeling or damage.
Planting Steps
Planting upside down hanging planters is a fun way to grow plants with a twist. Follow simple steps to make sure your plants stay healthy and strong in their new homes. This guide covers filling the planter, positioning the plant, and securing it firmly.
Filling With Soil
Start by choosing good potting soil. Fill the planter halfway with soil. Press the soil gently to remove air pockets. Leave space for the plant roots. Soil must be loose but firm for easy root growth.
Positioning The Plant
Pick a plant that grows well upside down. Make a small hole in the soil for the roots. Place the plant roots inside carefully. The plant stem should face downward. Adjust the plant until it feels stable.
Securing The Plant In Place
Use soft ties or twine to hold the plant. Wrap gently around the stem without squeezing. Make sure the plant won’t fall out. Check that the soil stays in place. This keeps your plant safe and growing well.
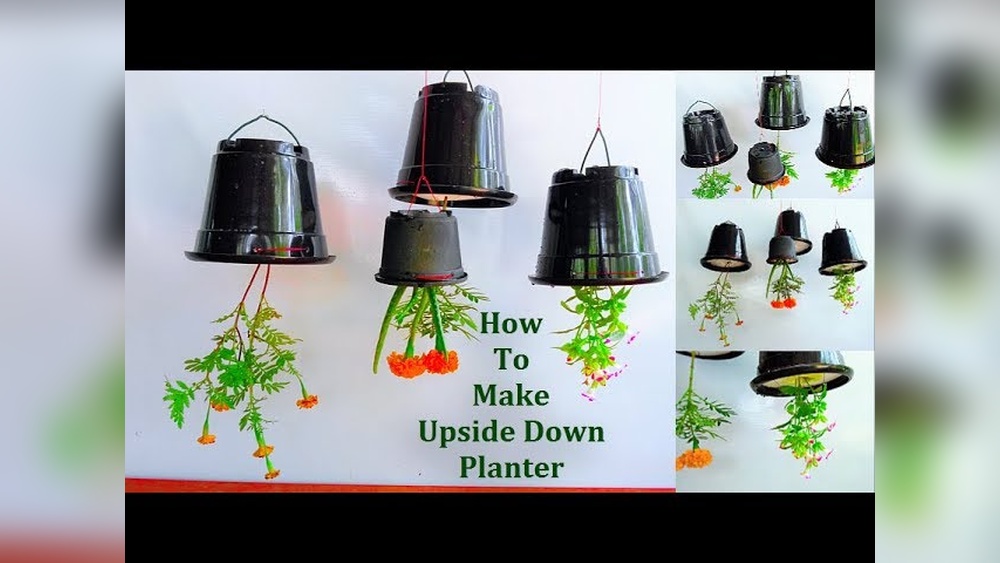
Hanging Your Planter
Hanging your upside down planter is an exciting step. It brings your garden to life in a new way. This part needs care and focus. A secure setup keeps your plants safe and healthy. Follow these simple steps to hang your planter properly.
Choosing A Location
Pick a spot with good sunlight for your plants. Avoid places with strong winds or heavy rain. Check the space around to allow your plant to hang freely. Make sure the location is easy to reach for watering and care. Think about how the planter will look in the room or garden.
Installing Hooks Or Supports
Use strong hooks or supports that can hold the planter’s weight. Choose metal or heavy-duty plastic hooks for safety. Find a sturdy ceiling beam or wall stud to install the hook. Drill a small hole before screwing in the hook. Test the hook by gently pulling it down to check strength.
Attaching The Planter Safely
Securely fasten the planter to the hook or support. Use a strong rope or chain designed for hanging plants. Tie knots tightly to prevent slipping. Double-check all connections before letting go. Make sure the planter hangs straight and steady to avoid spills.
Care And Maintenance
Caring for upside down hanging planters is simple with the right steps. These plants need special attention because of their unique position. Proper care helps them stay healthy and grow well. Understanding watering, feeding, and common problems keeps your plants happy.
Watering Tips
Water your hanging planter regularly but not too much. The soil should stay moist, not soggy. Use a watering can with a narrow spout to reach the soil easily. Water until you see it dripping from the drainage holes. Check the soil daily, especially in hot weather.
Fertilizing Schedule
Feed your plants with a balanced liquid fertilizer every two weeks. Dilute the fertilizer to half strength for best results. Fertilizing helps the plants get nutrients they need to bloom and grow. Avoid overfeeding, as it can harm the roots and leaves.
Troubleshooting Common Issues
Watch for yellow leaves, which may mean too much water. Brown tips often show when the air is too dry or the plant lacks nutrients. Check for pests like aphids or spider mites on leaves and stems. Remove any dead or damaged parts to keep the plant healthy. Adjust care based on what you observe.
Credit: dornob.com
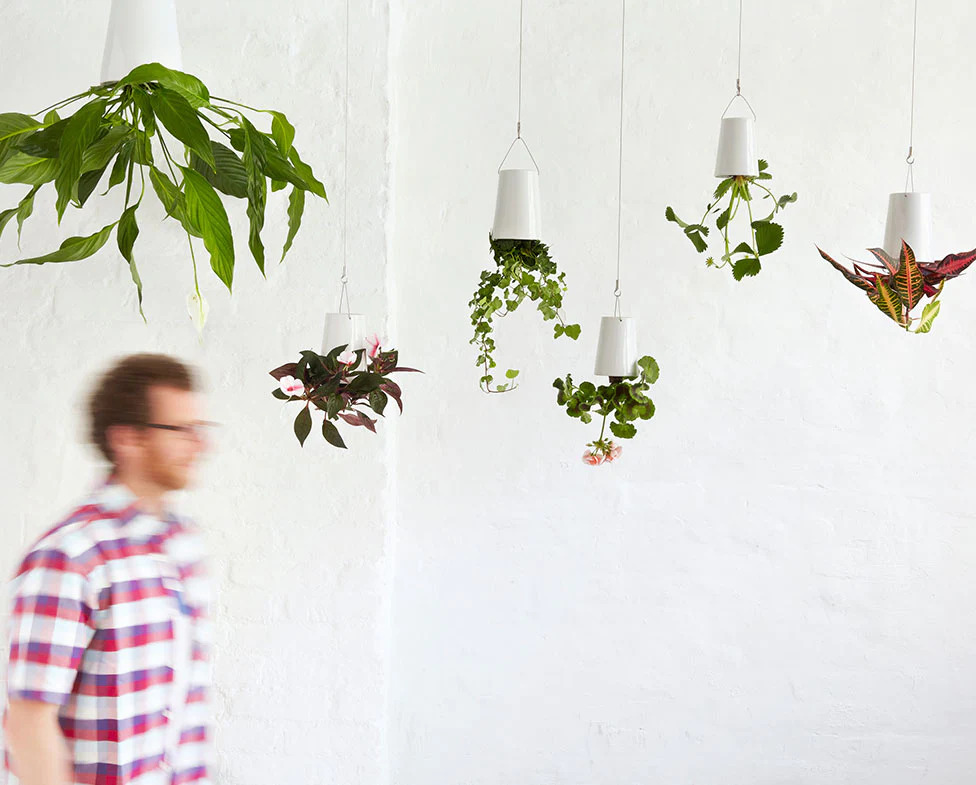
Creative Variations
Creative variations make upside down hanging planters exciting. They let you personalize your space with unique styles. Try different ideas to fit your taste and environment. These simple changes make your planters stand out and look beautiful.
Using Different Containers
Choose containers beyond the usual pots. Old teapots, mason jars, or tin cans work well. Each container gives a new shape and look to your planter. Use plastic bottles cut in half for a lightweight option. Wooden boxes add a rustic feel. Match containers with your home’s style for a nice touch.
Adding Decorative Elements
Decorate your planter for extra charm. Paint the container with bright or soft colors. Use stencils to create patterns or shapes. Glue small stones or beads around the edges. Wrap twine or ribbon to add texture. These small details make your planter more eye-catching.
Incorporating Lighting
Add lights to make your planter shine at night. Use small LED fairy lights inside the container. Solar-powered lights offer an eco-friendly option. Wrap string lights around the hanger for a glowing effect. Soft lighting highlights the plants and creates a cozy mood. It turns your planter into a beautiful night feature.
Frequently Asked Questions
What Materials Do I Need For Upside Down Hanging Planters?
You need a sturdy pot, strong rope or chain, soil, and plants suitable for hanging.
How Do I Choose Plants For Upside Down Hanging Planters?
Pick lightweight, drought-tolerant plants like herbs, succulents, or small flowers for easy care.
Can Upside Down Planters Damage My Plants?
No, proper soil and watering prevent damage and support healthy plant growth upside down.
How Often Should I Water Upside Down Hanging Planters?
Water once or twice a week, depending on plant type and weather conditions.
Where Is The Best Place To Hang Upside Down Planters?
Choose a spot with enough sunlight and good air circulation for healthy plants.
Conclusion
Creating upside down hanging planters adds fun and style to any space. They save room and give plants a unique look. You only need a few simple materials to start. Follow easy steps, and soon you’ll enjoy fresh greenery above you.
Try different plants to see what grows best hanging. These planters bring life and color to small areas. Give it a go, and watch your space transform in a simple way. Gardening can be easy and fun with upside down planters.