How to Make Self Watering Bottles for Plants: Easy DIY Guide
Are you tired of rushing home to water your plants or worrying they might dry out while you’re away? What if you could create a simple, cost-effective system that keeps your plants perfectly hydrated—without daily effort?
Making self-watering bottles for your plants is an easy DIY solution that saves you time and ensures your green friends stay healthy and vibrant. In this guide, you’ll learn step-by-step how to build your own self-watering bottles using materials you probably already have at home.
Credit: www.ehow.com
Materials Needed
Gathering the right materials is the first step to making self watering bottles for your plants. These items are easy to find and affordable. Using simple supplies helps create an effective watering system. This section lists all the essentials you need before starting.
Plastic Bottle
Choose a clean plastic bottle of any size. A 1-liter or 2-liter bottle works well. The bottle will hold water and slowly release it to the plant.
Sharp Tool For Holes
A small nail, pin, or needle will make tiny holes in the bottle cap or side. These holes allow water to drip out gradually. Handle sharp tools carefully to avoid injury.
String Or Cotton Wick
Use a piece of cotton string or wick to draw water from the bottle to the soil. The string acts like a bridge for water to flow slowly. Make sure the string is absorbent and long enough to reach the soil.
Plant Pot With Soil
Your plant needs a pot filled with soil. The soil should be dry enough to absorb water from the bottle. Use pots with drainage holes for best results.
Water
Clean water is essential. Fill the bottle with fresh water to keep your plant hydrated. Avoid using water that contains chemicals harmful to plants.
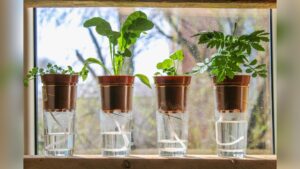
Water-wicking System
The water-wicking system is a simple, effective way to keep plants hydrated. It uses a rope or string to draw water from a container directly to the soil. This method ensures plants get water slowly and steadily, reducing overwatering risks.
This system works well for indoor and outdoor plants. It is especially useful during short trips or busy days when regular watering is hard. Setting it up correctly helps plants stay healthy and vibrant.
Choosing The Right Rope Or String
Select a rope made of natural fibers like cotton or jute. These materials absorb and transfer water well. Avoid synthetic ropes as they do not wick water effectively. The rope should be thick enough to hold moisture but thin enough to fit easily into the soil.
Measure the length to reach from the water container to the plant’s soil comfortably. Cut a piece slightly longer to allow good placement.
Setting Up The Water Container
Use a container such as a jar, bucket, or bottle to hold the water. The container must be clean to prevent mold or bacteria growth. Fill it with fresh water and place it higher than the plant’s soil level. This height difference helps water flow down the wick naturally.
Keep the container stable to avoid spills or tipping over.
Positioning The Wick In Soil
Insert one end of the rope into the water container, making sure it stays submerged. Place the other end several inches deep into the plant’s soil near the roots. This ensures water reaches where the plant needs it most.
Press the soil gently around the wick to keep it in place. Check the wick regularly to make sure it remains moist and properly positioned.
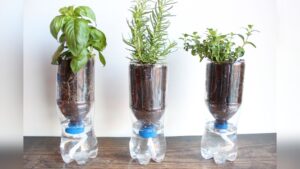
Bottle Drip System
The Bottle Drip System is an easy way to keep plants hydrated over time. It slowly releases water to the soil, avoiding overwatering. This system suits both indoor and outdoor plants. It uses simple materials that you likely have at home.
Setting up this system involves a few steps. First, select a suitable bottle and prepare it carefully. Then fill the bottle with water and position it correctly. Finally, adjust the drip rate to match your plant’s size and needs.
Selecting Bottles And Preparing Holes
Choose a clean plastic or glass bottle. A size between 500ml and 2 liters works best. Avoid bottles with cracks or leaks.
Use a small nail or needle to make tiny holes in the bottle cap. One or two holes are enough for slow dripping. Be careful not to make holes too big. This controls how fast water drips out.
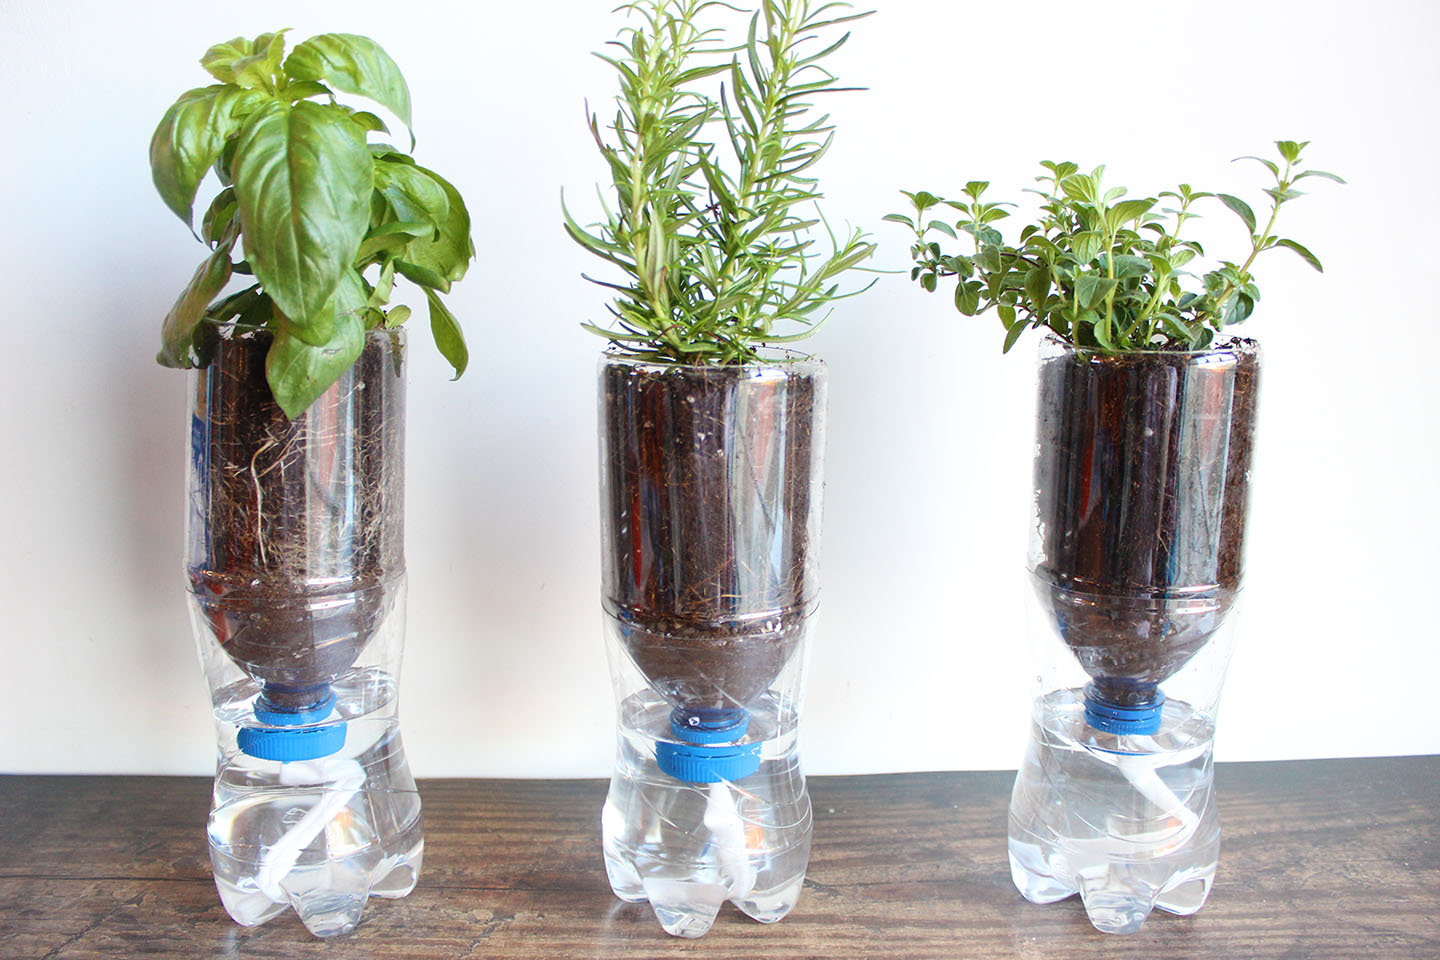
Filling And Inverting The Bottle
Fill the bottle with fresh water. Leave a little space at the top to avoid spills. Screw the cap back on tightly.
Turn the bottle upside down. Push the neck gently into the soil near the plant’s roots. The bottle should stand stable and not fall over. Water will slowly drip out through the holes, moistening the soil evenly.
Adjusting For Different Plant Sizes
Small plants need less water, so use fewer or smaller holes. Larger plants need more water; make holes slightly bigger or add one more.
Check the soil moisture regularly. Adjust the holes if the soil stays too wet or too dry. This helps keep your plants healthy and happy.
Placement And Maintenance
Proper placement and regular maintenance keep self-watering bottles effective. Good care ensures plants get the right amount of water. It also helps avoid common problems like root rot or drying out. Follow simple steps to keep your plants healthy and happy.
Grouping Plants For Humidity
Place plants close together to raise humidity levels. Grouped plants create a small humid microclimate. This helps plants absorb water better from the soil. Self-watering bottles work best in such moist environments. Check the group often to make sure all plants get water.
Avoiding Direct Sunlight
Keep self-watering plants out of harsh sunlight. Direct sun heats the water too fast and evaporates it quickly. It can also dry out the soil despite the bottle’s water supply. Find a bright spot with indirect light instead. This slows water loss and protects delicate leaves.
Pruning For Water Conservation
Trim dead or extra leaves regularly to save water. Pruning reduces the plant’s water needs and helps it grow strong. Cut back wilted, yellow, or crowded parts carefully. This allows water to reach roots more efficiently. Healthy plants use water from bottles better.
Enhancing Moisture Retention
Enhancing moisture retention is key to keeping plants healthy with self-watering bottles. The goal is to keep soil moist for longer. This helps plants absorb water slowly and prevents drying out. Simple steps can improve how well your setup holds moisture.
Adding Mulch
Mulch covers the soil surface around the plant. It reduces water evaporation from the soil. Use organic materials like straw, leaves, or wood chips. Spread a thin layer of mulch around the plant base. This keeps the soil cool and moist longer. Mulch also prevents weeds that compete for water.
Deep Watering Before Setup
Water the plant deeply before installing the self-watering bottle. This saturates the soil near the roots. Deep watering helps the soil hold moisture better. It also encourages roots to grow deeper. Healthy roots improve water absorption and keep the plant hydrated. Make sure the soil is moist but not soggy before placing the bottle.

Credit: m.youtube.com
Troubleshooting Tips
Troubleshooting self watering bottles helps keep plants healthy. Small problems can stop water from reaching roots. Fix these issues early to keep plants growing strong. Simple checks and adjustments improve watering systems greatly.
Preventing Overwatering
Too much water harms plant roots. Check bottle holes to control flow speed. Use smaller holes for slower water release. Place bottles at an angle to reduce water flow. Avoid water pooling on soil surface. Add sand or pebbles to soil for better drainage. Watch plant leaves for signs of overwatering. Yellow, soft leaves mean too much water.
Dealing With Slow Drip Rates
Slow drip means plants get little water. Clean bottle holes if clogged with dirt. Use a pin to open blocked holes carefully. Check water level in the bottle often. Refill bottle to keep water flowing. Adjust hole size for faster drip if needed. Warm water flows quicker than cold water. Move bottle to warmer spot if possible.
Extending Watering Duration
Extending the watering duration of your self-watering bottles helps keep plants hydrated longer. This reduces how often you must refill the bottles. Longer watering times are great for busy gardeners or when you travel. Simple changes can make a big difference in water supply.
Using Larger Bottles
Choose bigger bottles to hold more water. A two-liter soda bottle works well. Larger bottles release water slowly over many days. This means your plants get steady moisture without frequent refills. Make sure the bottle fits well in the soil. It should not tip over or block plant growth.
Fill the bottle completely before placing it in the soil. The bigger the bottle, the longer the watering lasts. This is perfect for plants that need constant moisture. Using large bottles also saves time and effort.
Multiple Bottle Arrangements
Use several small bottles around one plant for longer watering. Space them evenly for balanced moisture. Each bottle adds water supply to the soil. This method works well for larger pots or garden beds. You can control water flow by changing bottle size or hole size.
Multiple bottles reduce dry spots in the soil. They keep roots evenly moist for better plant health. This setup is flexible and easy to adjust as plants grow. It also helps during hot weather when plants need more water.

Credit: www.thegardenglove.com
Frequently Asked Questions
How To Water Plants While Away For 2 Weeks Diy?
Use a water-wicking system by placing a rope from a water container into soil. Or create a bottle drip by poking holes in a water-filled bottle and inserting it into soil. Water plants well, group them, and add mulch to retain moisture before leaving.
How Do You Make Homemade Self Watering Hacks?
Make a self-watering system by poking holes in a water-filled bottle cap. Invert it into plant soil for slow watering. Alternatively, use a water-wicking system with a rope from a water container into the soil to keep plants hydrated consistently.
Can I Build My Own Automatic Watering System?
Yes, you can build your own automatic watering system using simple DIY methods like water-wicking ropes or bottle drip systems. These methods provide consistent moisture and are easy to set up for indoor or outdoor plants.
How To Make A 5 Gallon Self-watering Container?
Use a 5-gallon container as a water reservoir. Insert a wick from the water into the soil. Fill the container with water and place it above soil level for gravity-fed watering.
Conclusion
Making self-watering bottles for your plants saves time and effort. These simple tools keep soil moist for days. They help plants grow healthy, even when you are away. Using easy materials, you can create a steady water supply. Your plants will thank you with greener leaves and stronger roots.
Try this method to keep your garden thriving with less work. Small steps like these make plant care easier and more fun. Give it a try and watch your plants flourish.