How to Make a Planter Self Watering: Easy DIY Guide for Lush Plants
Tired of constantly checking if your plants need watering? Imagine a planter that takes care of itself, keeping your greenery happy even when you’re busy or away.
Making a self-watering planter is easier than you think, and it can save you time, water, and the stress of forgotten watering. In this guide, you’ll discover simple, DIY methods to transform any planter into a self-sustaining oasis. Whether you want a drip system using a plastic bottle or a clever wicking setup with cotton string, you’ll learn step-by-step how to keep your plants perfectly hydrated with minimal effort.
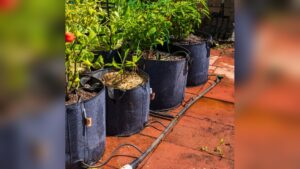
Benefits Of Self-watering Planters
Self-watering planters offer many advantages for gardeners of all levels. They help keep plants healthy by providing a steady water supply. These planters save time and water, making gardening easier and more efficient. Here are some key benefits that make self-watering planters a smart choice for your garden.
Consistent Moisture Levels
Self-watering planters keep soil moisture steady. Plants get water as they need it without drying out or flooding. This balance helps roots grow strong and healthy. Consistent moisture also reduces plant stress and improves growth.
Water Conservation
These planters use water efficiently. Water is stored in a reservoir and released slowly. This prevents waste from evaporation or runoff. Using less water is good for the environment and lowers your water bills.
Reduced Maintenance
Self-watering planters require less frequent watering. You don’t have to check soil moisture every day. This saves time, especially for busy gardeners or when away. Plants stay hydrated longer, reducing the risk of forgetting to water.
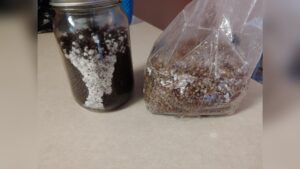
Materials Needed
Creating a self-watering planter requires a few simple materials. These items help store water and deliver it to your plants slowly. Choosing the right materials ensures your plants stay healthy and hydrated with less effort.
Containers And Reservoirs
Select a container that holds soil and plants well. Common choices include plastic pots, ceramic planters, or repurposed containers. You also need a separate reservoir to store water. This can be a larger pot base, a plastic bottle, or any watertight container placed below or inside the planter.
Wicking Materials
Wicking materials transfer water from the reservoir to the soil. Cotton ropes, shoelaces, or strips of fabric work best. These materials absorb water and carry it upward through capillary action. Choose natural fibers for better water absorption and durability.
Tools And Accessories
Basic tools simplify the building process. You will need scissors or a knife to cut wicks and containers. A drill or nail helps make small holes for water flow. Tape or glue can secure parts together. A marker helps mark cutting points or measurements.
Building A Drip System
Building a drip system is a simple way to make your planter self-watering. This system slowly releases water into the soil. It helps keep plants hydrated for several days without extra effort.
You only need a few basic materials like a plastic bottle and a tool to make small holes. The drip system works by gravity, letting water drop slowly to the roots.
Preparing The Bottle
Start with a clean plastic bottle. Remove any labels and rinse it well. Use a nail or skewer to poke a small hole in the bottle cap. This hole controls how fast the water drips out.
Make sure the hole is tiny. If needed, adjust it later to get the right drip speed. Fill the bottle with water before sealing it with the cap.
Adjusting Drip Rate
To control the drip rate, insert a cotton swab or small stick through the hole. This slows the water flow. Test the drip by turning the bottle upside down over a bowl.
Count how many drops fall per minute. Adjust the size of the hole or the cotton swab to get a steady, slow drip. The goal is to keep soil moist, not flooded.
Inserting And Securing The Bottle
Dig a small hole near the plant’s roots. Place the bottle upside down with the cap buried slightly in the soil. The bottle neck should be stable and not tip over.
Use tape or a stick to secure the bottle if needed. Check regularly to refill water and ensure the drip continues. This simple setup keeps your plants watered for days.
Credit: www.ehow.com
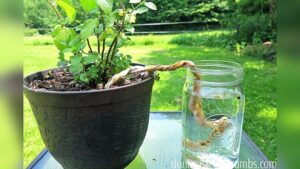
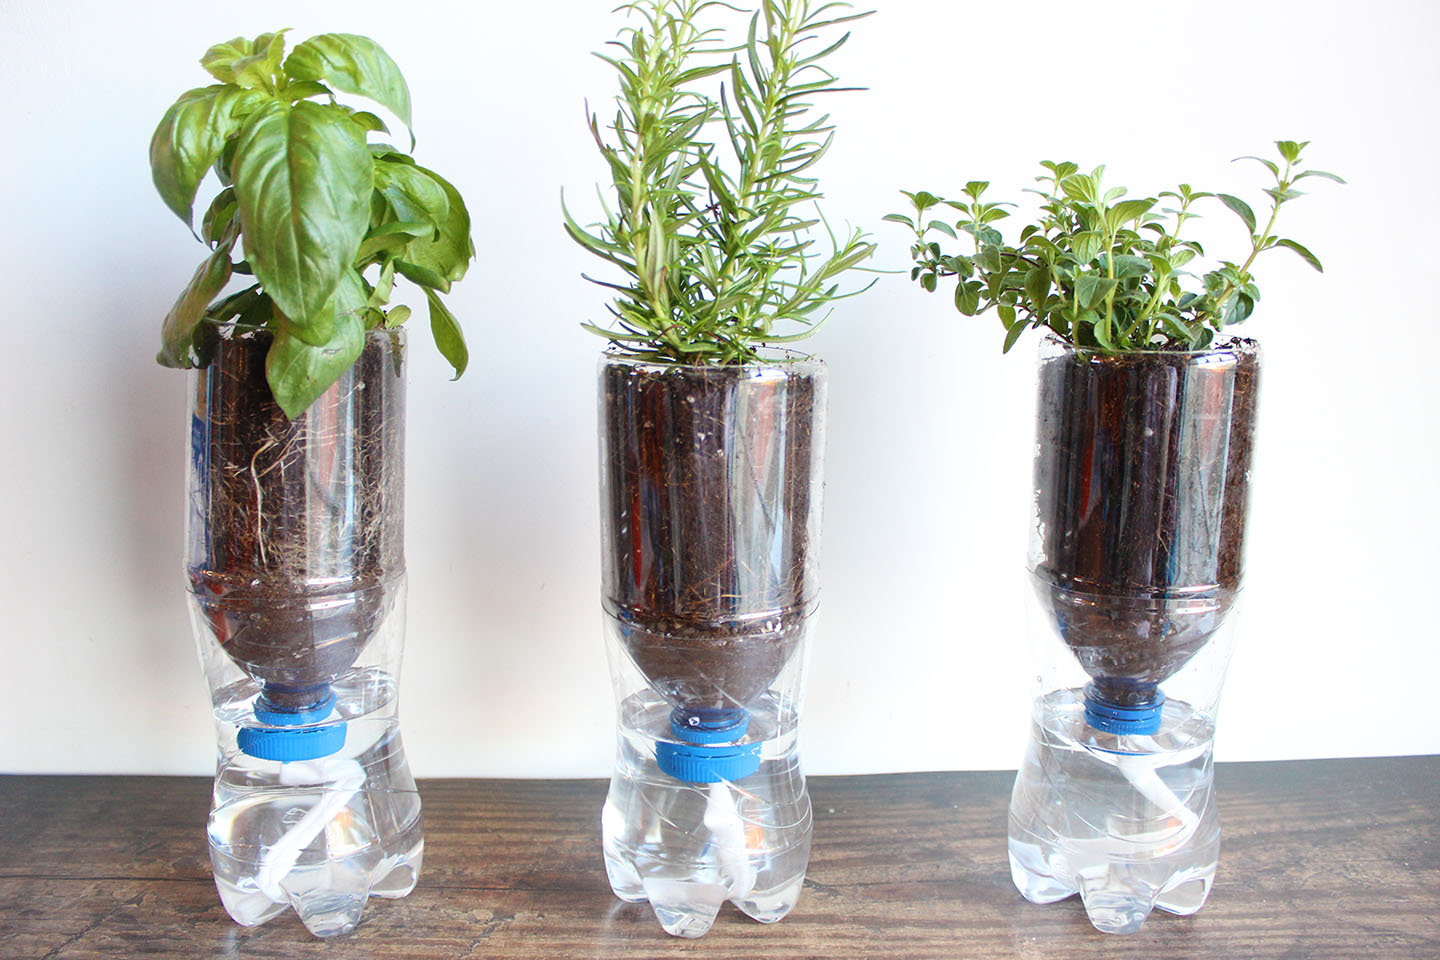
Creating A Wicking System
Creating a wicking system is a simple and effective way to make your planter self-watering. This system uses a wick to draw water from a reservoir into the soil. It keeps the soil moist without overwatering. Setting it up correctly helps your plants stay healthy and hydrated for days.
Choosing The Right String
Pick a string that absorbs water well. Cotton or nylon strings work best. Avoid synthetic strings that repel water. The string should be thick enough to move water but thin enough to fit in the planter.
Setting Up The Reservoir
Use a container to hold water below the planter. It can be a jar, bottle, or a small bucket. Make sure it holds enough water to last several days. The reservoir should sit lower than the soil level for gravity to help water flow.
Positioning The Wick
Place one end of the string deep in the soil near the plant roots. The other end should dip into the water reservoir. Ensure the string stays wet at both ends. This setup pulls water from the reservoir up to the soil slowly and steadily.
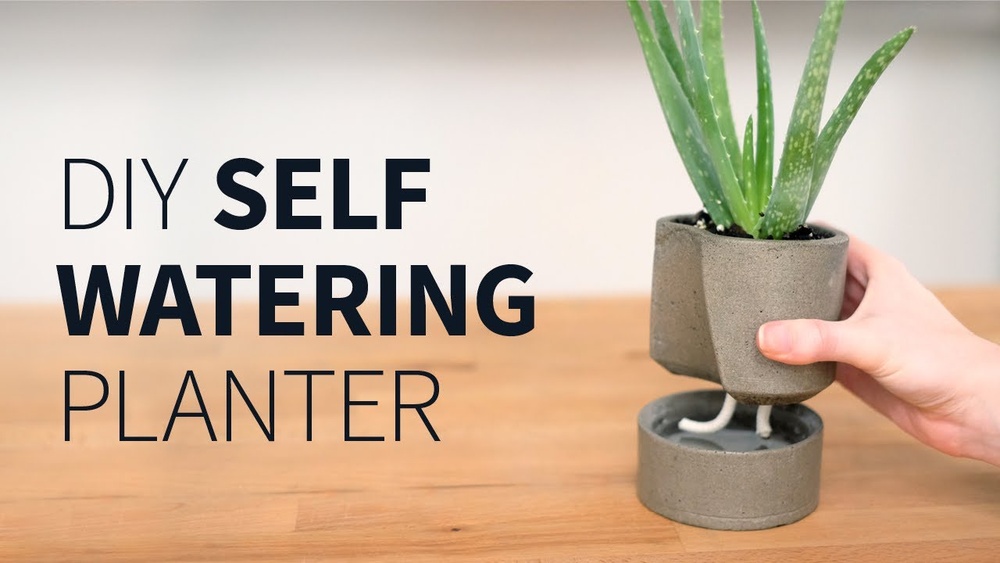
Using Concrete Planters
Concrete planters offer durability and a modern look for your garden. They retain moisture well, making them a great choice for self-watering designs. Their weight keeps plants stable, especially outdoors. Creating a self-watering concrete planter can save time and keep plants healthy with consistent moisture.
Design Tips
Choose a concrete mold with a deep basin to hold soil and water. Ensure drainage holes are placed high enough to prevent waterlogging. Use a separate water reservoir below the soil level inside the planter. This design allows water to be drawn up by the roots when needed. Smooth the interior walls to help water flow evenly. Consider the planter’s size to match the plant’s water needs.
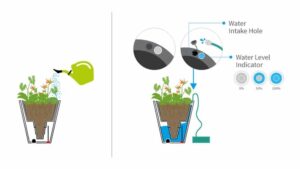
Integrating Self-watering Features
Build a water reservoir at the bottom of the planter before adding soil. Insert a wick made of cotton or nylon to connect the reservoir to the soil. The wick pulls water up through capillary action to keep soil moist. Add an overflow hole to prevent excess water buildup. Seal gaps with waterproof concrete sealant to avoid leaks. Top off the reservoir through a hidden opening for easy refills.

Credit: www.prettypurpledoor.com
Maintaining Your Self-watering Planter
Maintaining your self-watering planter keeps your plants healthy and thriving. Regular care ensures the system works properly. Neglecting maintenance can cause water flow problems and plant stress. Follow simple steps to keep your planter in top shape.
Refilling Water
Check the water reservoir often. Fill it before it runs dry. Use clean water to avoid buildup. Avoid overfilling to prevent waterlogging. Keep the water level steady for consistent plant hydration.
Cleaning Components
Clean the water reservoir and wicks regularly. Remove dirt and algae to prevent clogs. Use mild soap and water for cleaning. Rinse thoroughly to avoid soap residue. Dry parts before reassembling to prevent mold growth.
Troubleshooting Common Issues
Watch for slow or no water flow. Check if the wick is blocked or dry. Ensure the reservoir has enough water. Look for root rot caused by excess moisture. Adjust the wick or drainage if needed to fix problems.
Best Plants For Self-watering Planters
Choosing the right plants for self-watering planters ensures healthy growth and less maintenance. These planters keep soil moist by providing water gradually. Some plants thrive better in this steady moisture environment. Select plants that prefer consistent watering without waterlogging.
Indoor Favorites
Snake plants do well in self-watering planters. They tolerate low light and need little water. Spider plants also thrive with steady moisture. Pothos plants grow fast and enjoy constant hydration. Peace lilies bloom beautifully with regular water supply. These indoor plants stay green and healthy with less effort.
Vegetables And Herbs
Basil is perfect for self-watering containers. It loves moist but not soggy soil. Lettuce grows quickly and stays crisp with constant water. Cherry tomatoes produce well in these planters. Mint spreads fast and enjoys steady moisture. Parsley benefits from regular watering and stays fresh. These vegetables and herbs reward gardeners with good harvests.
Flowering Plants
Begonias bloom well with even soil moisture. Impatiens brighten up shady spots and prefer moist soil. African violets love humidity and steady watering. Geraniums do well but avoid overwatering their roots. Marigolds handle constant moisture and flower often. These flowers bring color and life to self-watering planters.

Credit: www.anikasdiylife.com
Tips For Success
Creating a self-watering planter can save time and keep plants healthy. Success depends on careful attention to a few important details. These tips help you maintain the right moisture level and avoid common problems. Follow these simple steps for best results.
Monitoring Soil Moisture
Check soil moisture regularly to keep plants happy. Use your finger or a moisture meter to test the soil. The soil should be moist but not soggy. Adjust the water reservoir if the soil feels too dry or too wet. This simple check helps prevent plant stress and promotes steady growth.
Adjusting For Climate
Climate affects how much water plants need. In hot, dry weather, plants use water faster. Add more water to the reservoir during these times. Cooler or humid conditions mean less water is needed. Watch your plants closely and change watering amounts to match the weather.
Preventing Overwatering
Too much water can harm plants and cause root rot. Make sure the planter has good drainage. Keep the water reservoir at a safe level to avoid flooding the roots. Remove excess water if the soil stays too wet. Careful control of water prevents problems and keeps plants strong.
Frequently Asked Questions
How To Keep Planters Watered While Away?
Create a DIY self-watering system using a plastic bottle drip or cotton string wicking method. Both supply water slowly to plants. Fill a bottle or reservoir, place in soil, and let plants absorb water while away. Secure and test drip rates for best results.
How Do You Make Homemade Self-watering System?
Create a self-watering system by poking a hole in a plastic bottle cap, filling it with water, and inverting it into soil. Alternatively, use a cotton string from a water reservoir to soil to wick water slowly to roots.
Do Self-watering Planters Really Work?
Self-watering planters work by providing consistent moisture through reservoirs or wicking systems. They reduce watering frequency and help plants thrive.
What To Use A Wick For Self-watering Planter?
Use a cotton wick to draw water from a reservoir into the soil by capillary action. It keeps plants hydrated consistently.
Conclusion
Creating a self-watering planter helps keep plants healthy with less effort. Use simple tools like bottles or cotton strings for easy setups. These systems save water and provide steady moisture to roots. Regular checks ensure the water reservoir stays filled.
This method suits busy gardeners or those new to plant care. Try making your own self-watering planter today and enjoy thriving plants.